Installing Windows 10 on Mac Pro 6,1 (2013)
We will be installing using Apple BootCamp assistant utility directly from the latest macOS Monterey 12.7.6. This will bring full functionality to Apple Studio Display as well as Apple Pro Display XDR with sound, microphone and webcam working. Also all new Apple branded devices like Magic Trackpad with Precision Touchpad support and Magic Mouse would work perfectly.
We recommend using built-in HDMI port for the installation. Post instalaltion it could be later switched to miniDisplayPort (Thunderbolt 2) connection to get full resolution.
If you have Apple Studio Display or Pro Display XDR please use WJESOG DisplayPort to USB-C cable (https://www.amazon.com/WJESOG-DisplayPort-Adapter-Converter-Thunderbolt/dp/B0BNX7MS6N/) + any HDMI to DisplayPort adapter, then replace this adapter with any 4K miniDisplayPort to DisplayPort adapter e.g. from Cable Matters (https://www.amazon.com/Cable-Matters-Przej%C5%9Bci%C3%B3wka-DisplayPort-kolorze/dp/B00HNF0KF0/).
Apple Studio Display/Pro Display XDR might show violet colors on boot screen/boot picker until proper driver gets is loaded when used with a built-in HDMI port. If you have such issue just ignore this and continue installation. This will fix as soon the driver get loaded or your replug to miniDisplayPort.
Please note a maximum resolution via HDMI is 2K@60Hz, while via miniDisplayPort 4K@60Hz is possible. If you want to get full 5K@60Hz (on Apple Studio Display) or 6K@60Hz (on Pro Display XDR) resolution you need to get one of our eGPU cards.
Make sure no external drives are connected (either USB or NVMe) during installation. They can be replugged back post the installation.
Windows 10 needs to be installed on a separate partition of your internal drive.
No USB flash drive or DVD drive is needed for the installation.
Apple Crossfire mode (two linked internal AMD FirePro graphics cards) will be enabled automatically.
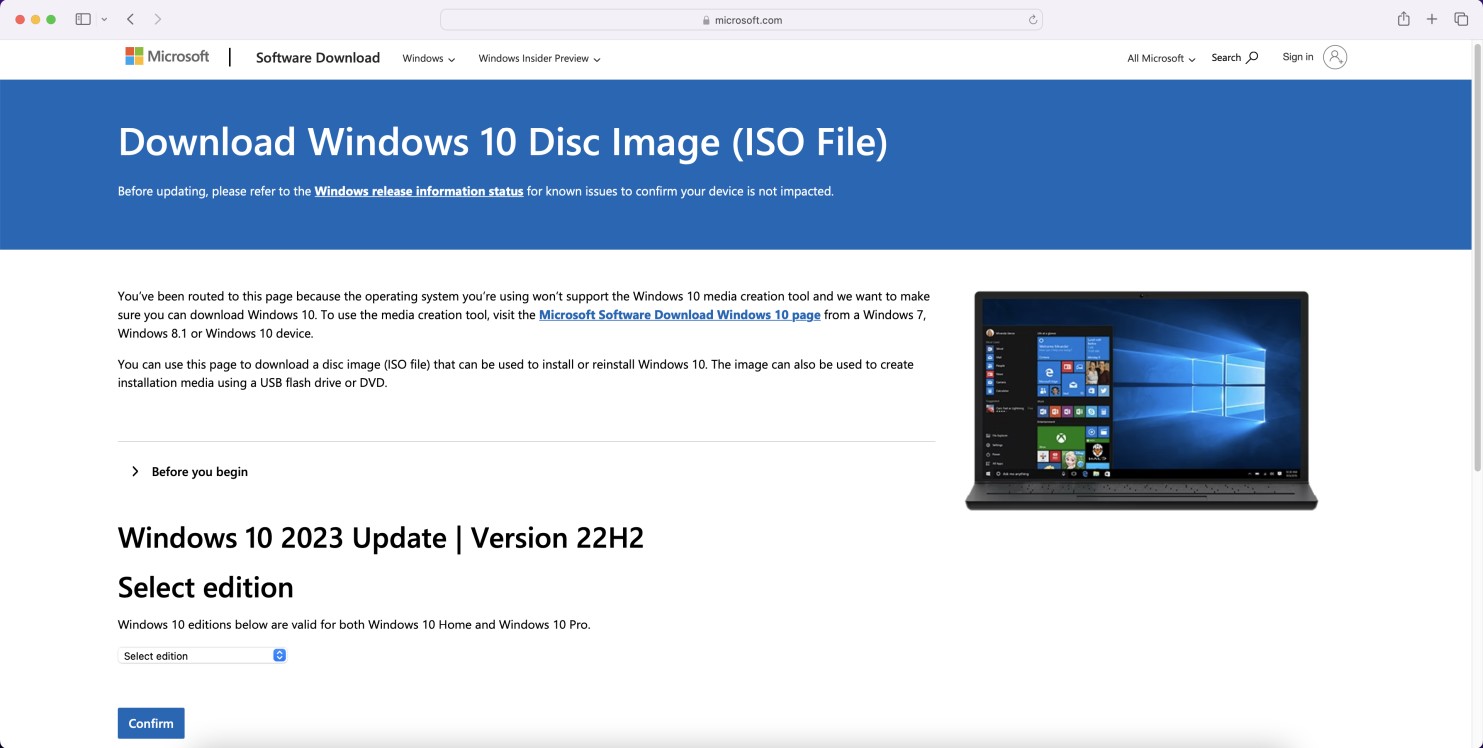
Step 1Open a following page https://www.microsoft.com/en-us/software-download/windows10iso in any web browser e.g. Safari. |
|
|
|
|
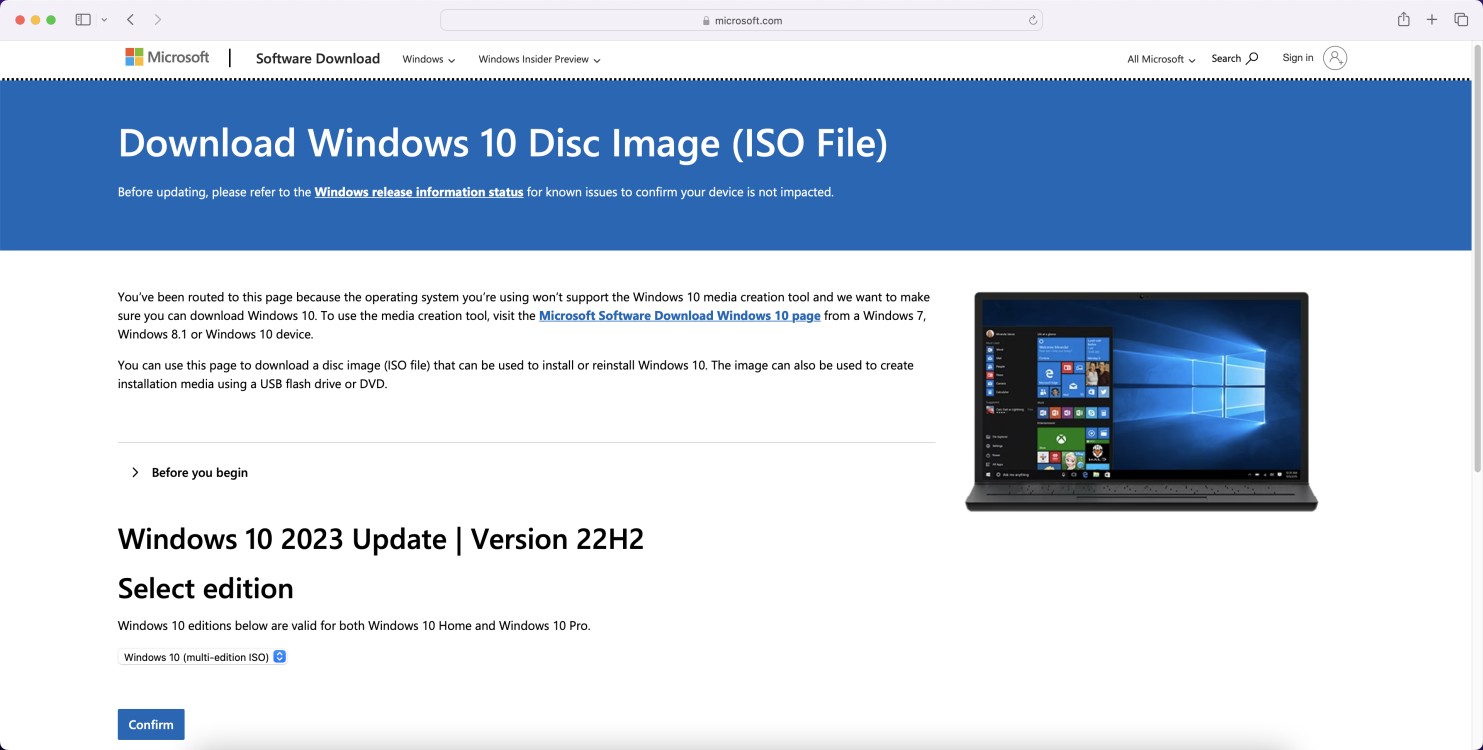
Step 2Choose Windows 10 (multi-edition ISO) from the dropdown list and click Confirm button. |
|
|
|
|
Step 3Now select product language from the dropdown list e.g. English (United States) and again click Confirm button. |
|
|
|
|
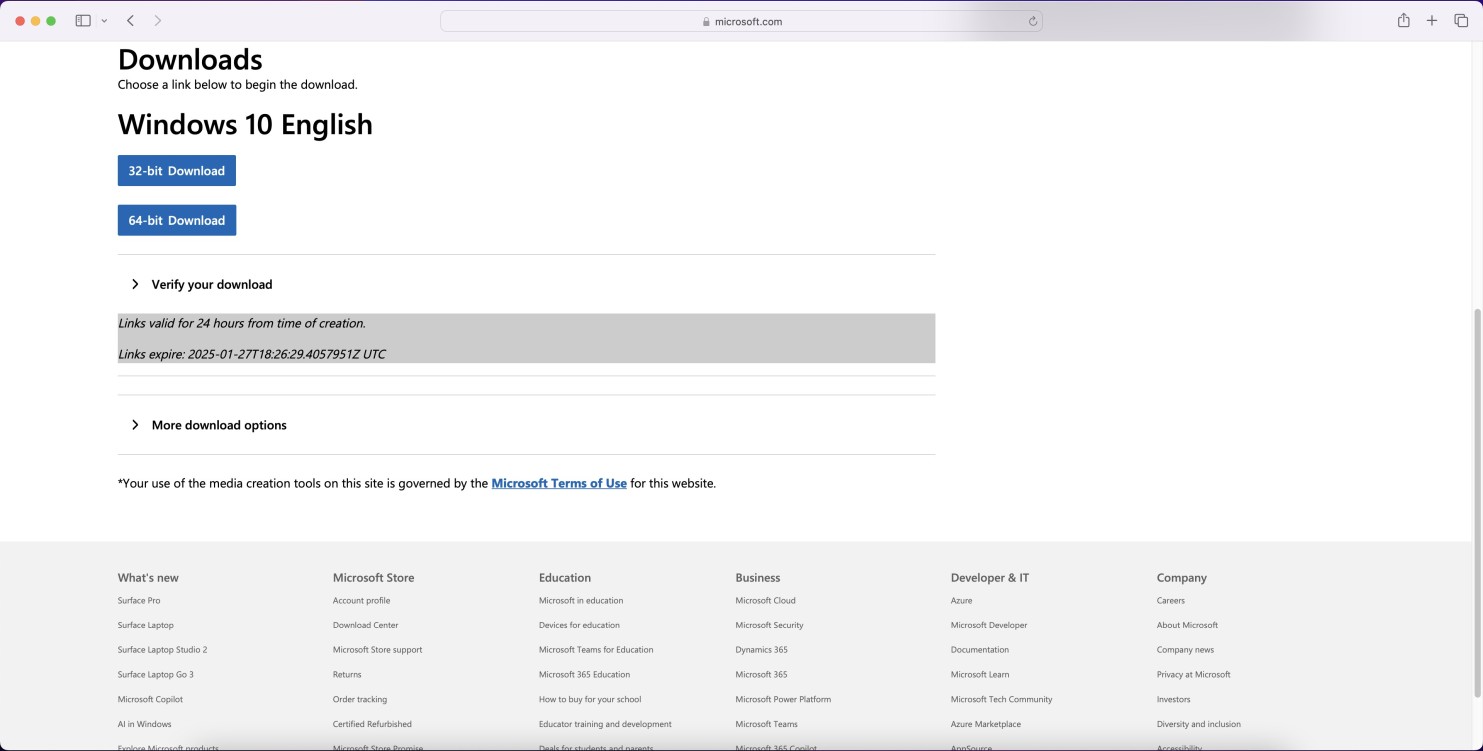
Step 4Click 64-bit Download button. This will download about 6,14 GB ISO file with Windows 10 installer directly to your Downloads folder. |
|
|
|
|
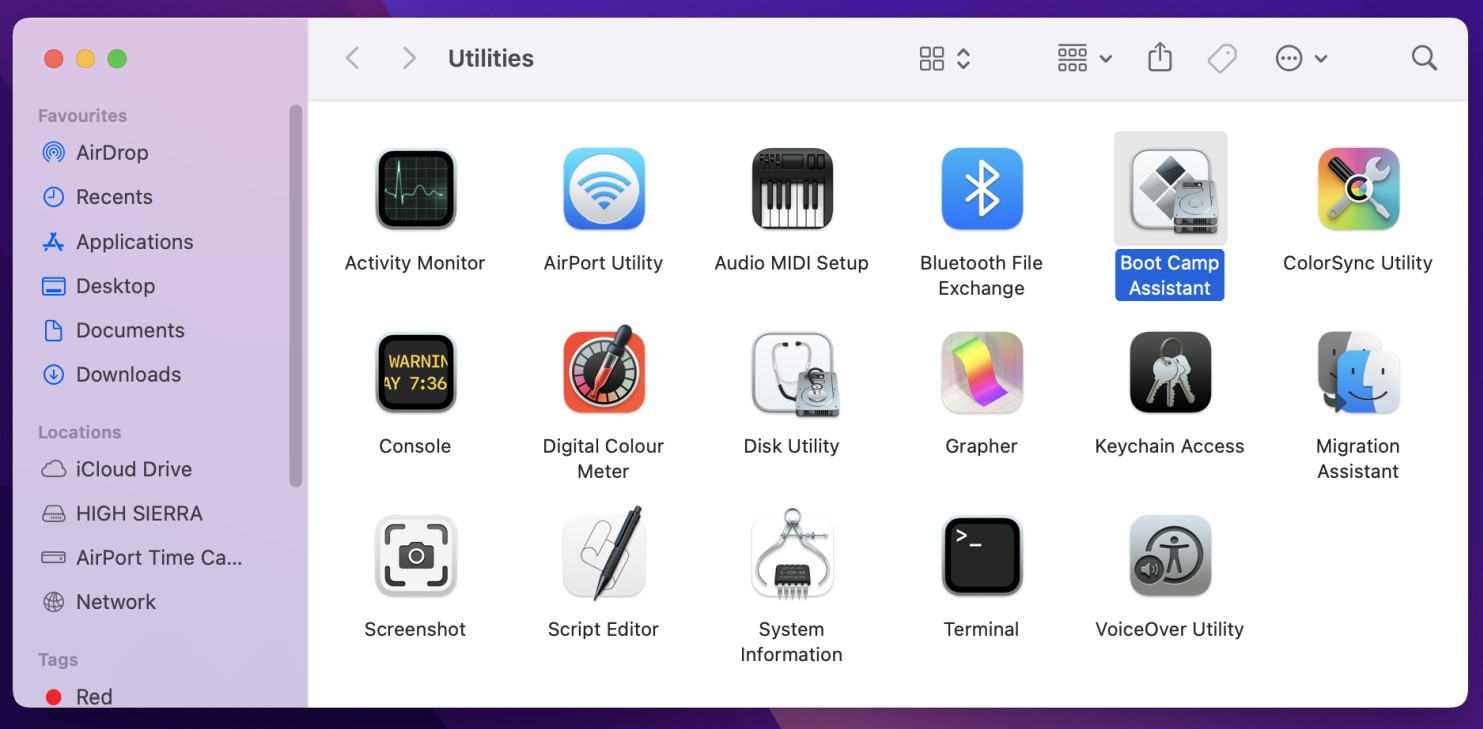
Step 5Now it's time to launch BootCamp assistant utility. In Finder menu choose Go, then choose Utilities. |
|
|
|
|
Step 6Double click Boot Camp Assistant icon to launch it. |
|
|
|
|
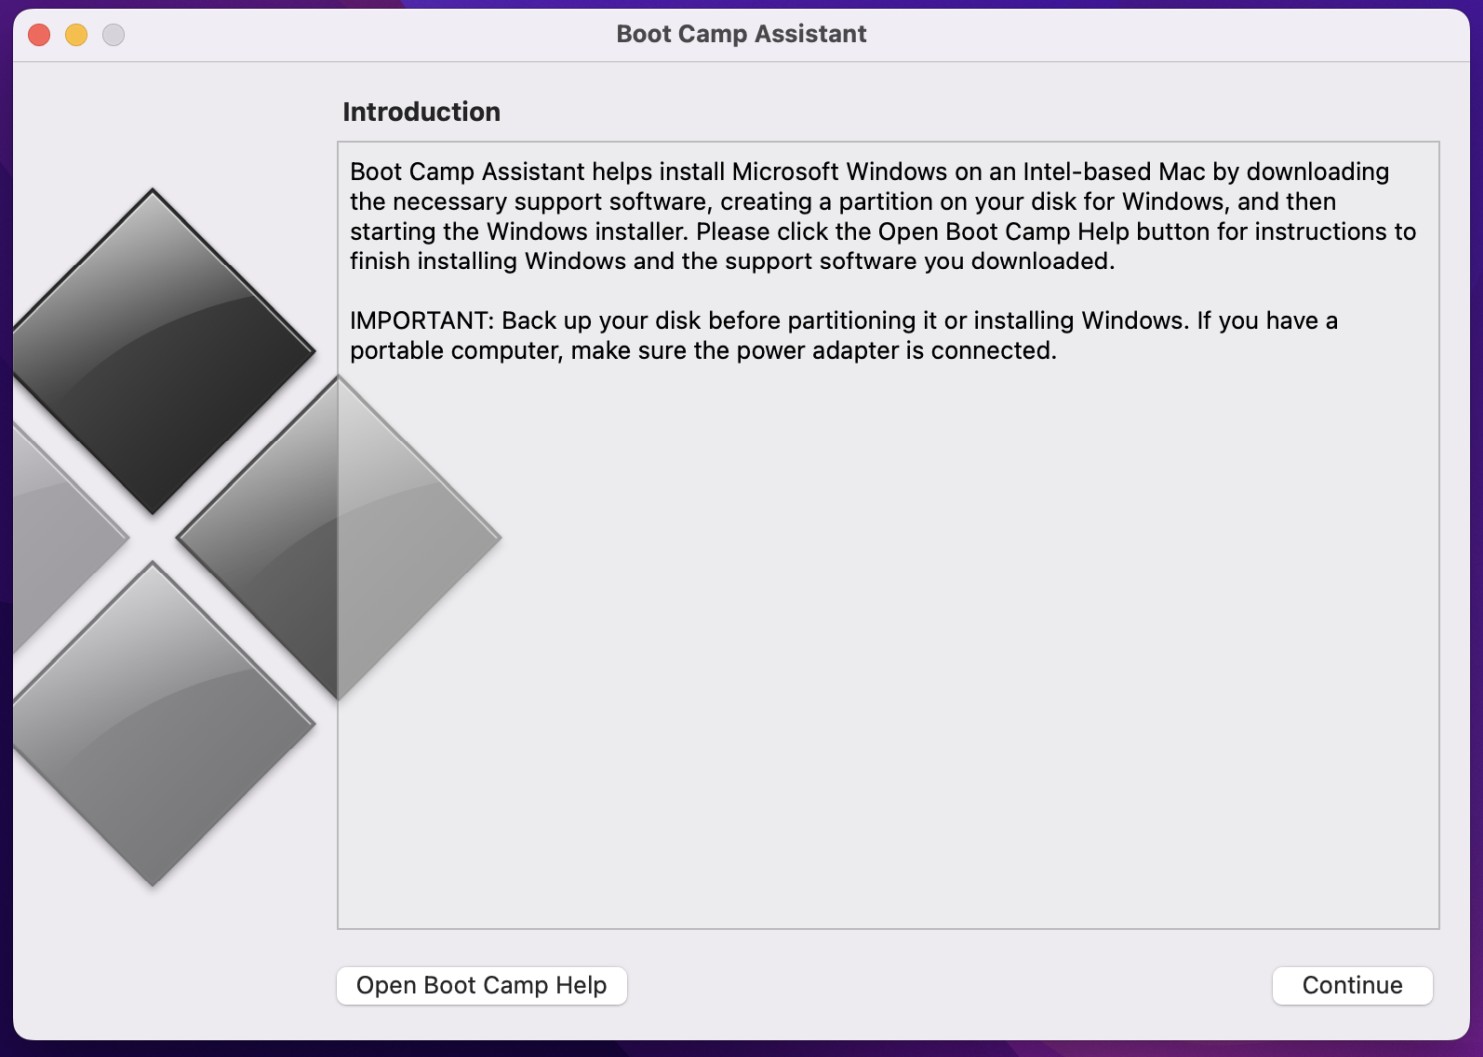
Step 7Click Continue button. |
|
|
|
|
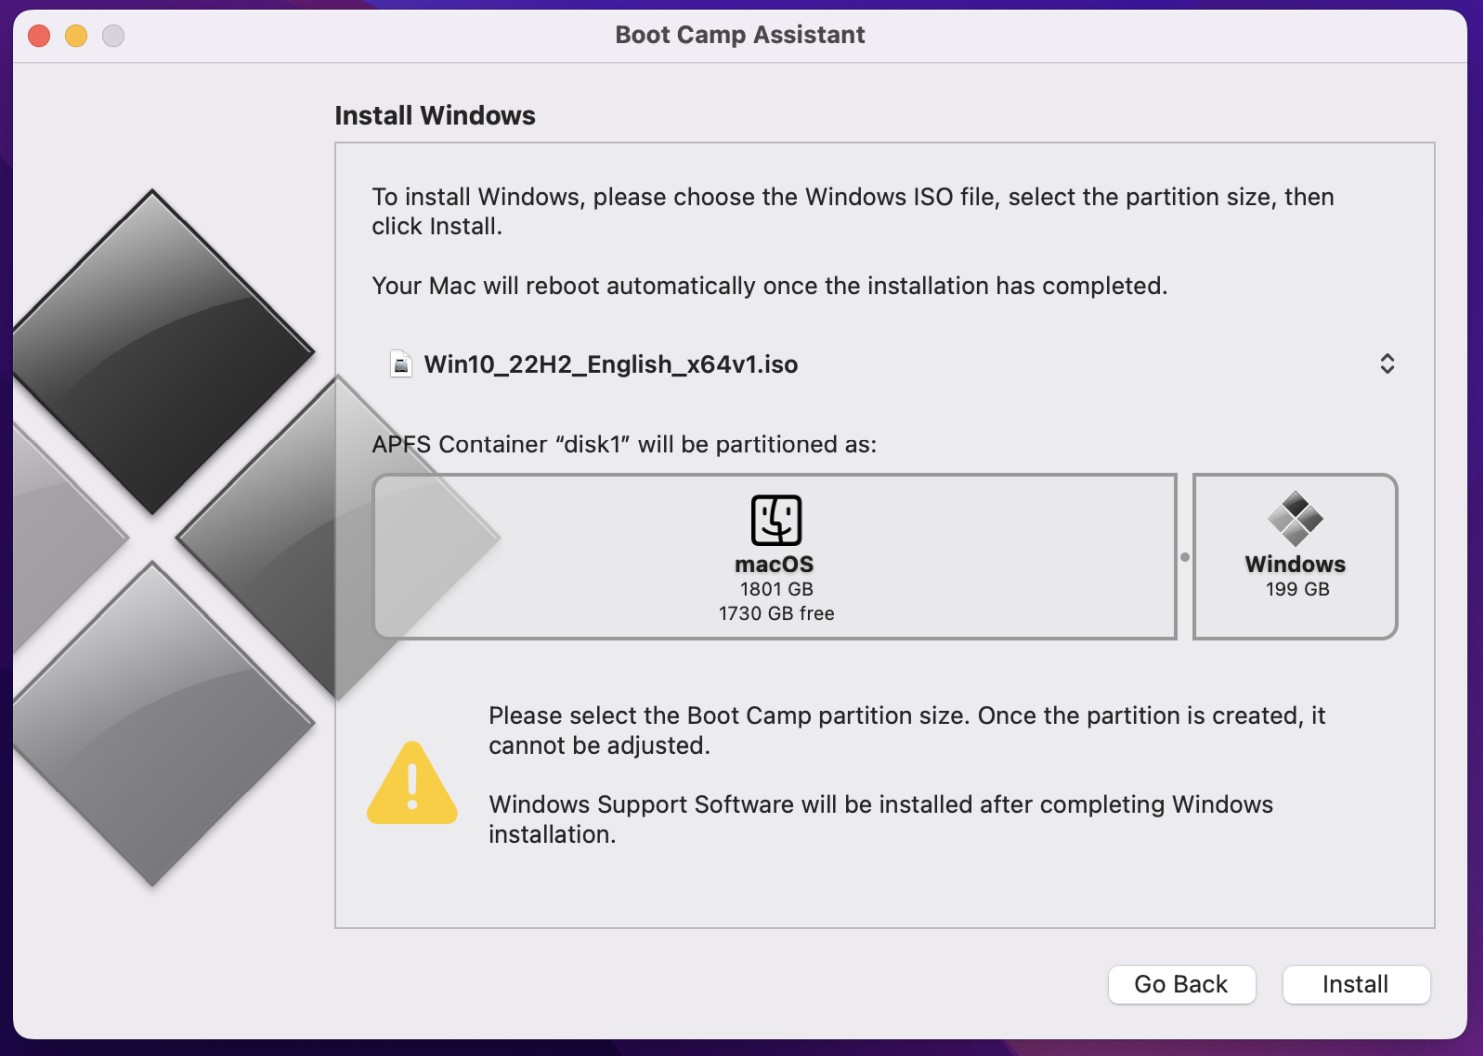
Step 8Here you need to resize your current macOS partition so Windows 10 would fit. Minimum size is 45 GB, but we recommend at least 100 GB as it cannot be adjusted in future.
Move the dot between partitions to set proper size you wish.
Finally click Install button to start the installation. |
|
|
|
|
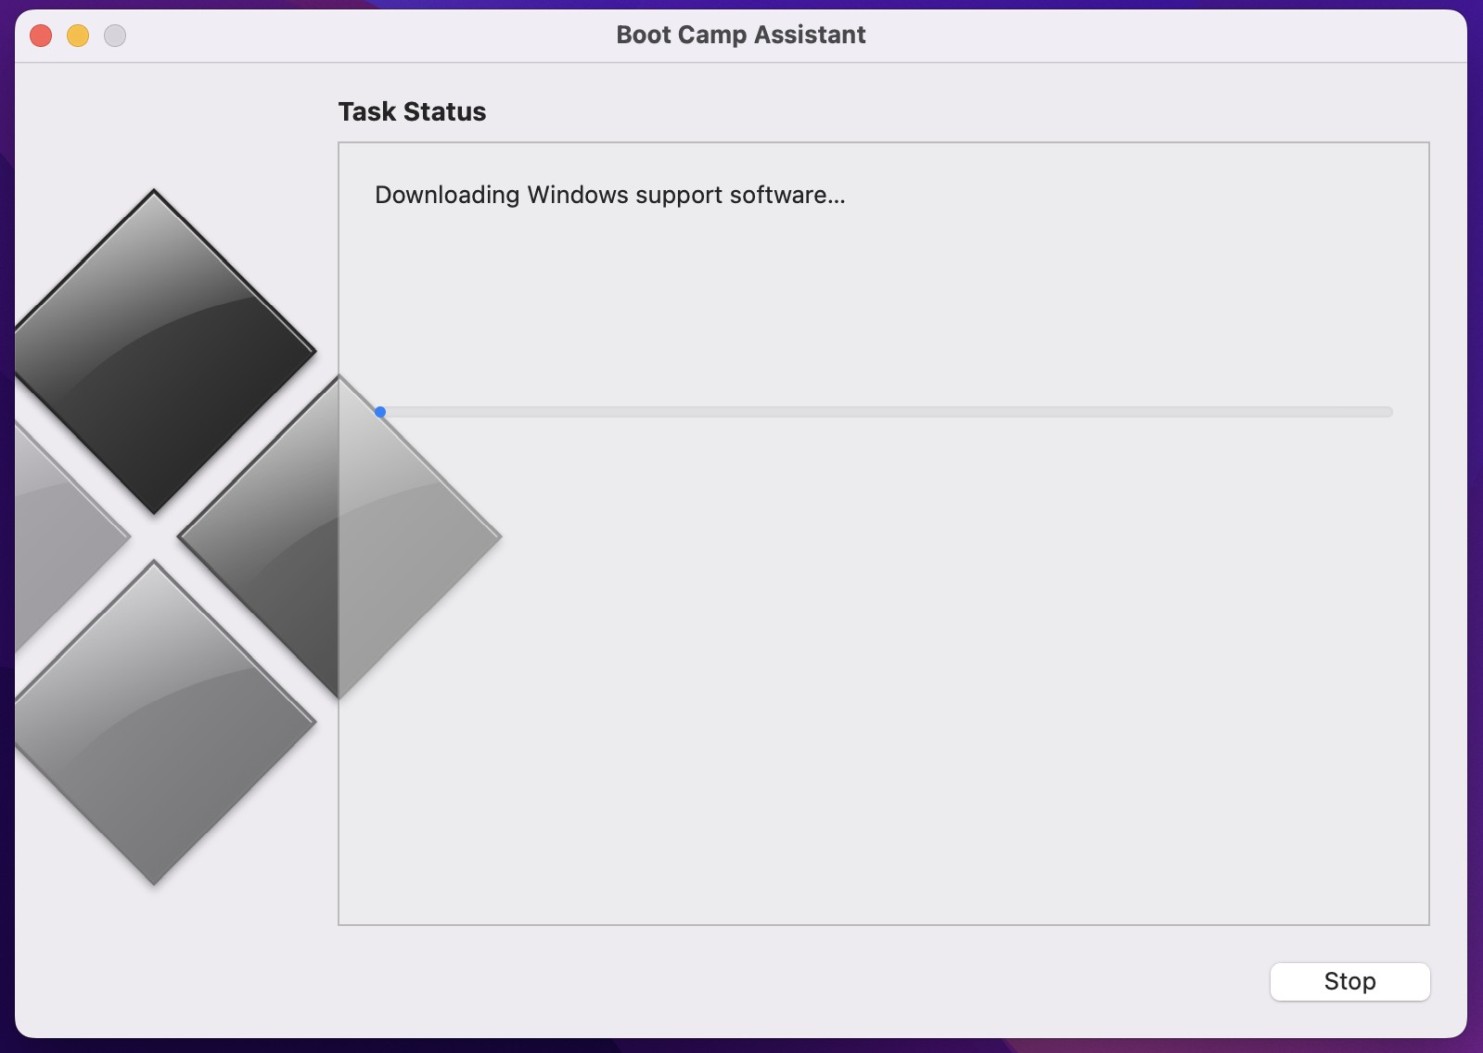
Step 9The assistant will download all the drivers needed for Windows 10 directly from Apple servers. It will take a few minutes to complete depending on your Internet connection speed. Then they will be saved on your new Windows partition. |
|
|
|
|
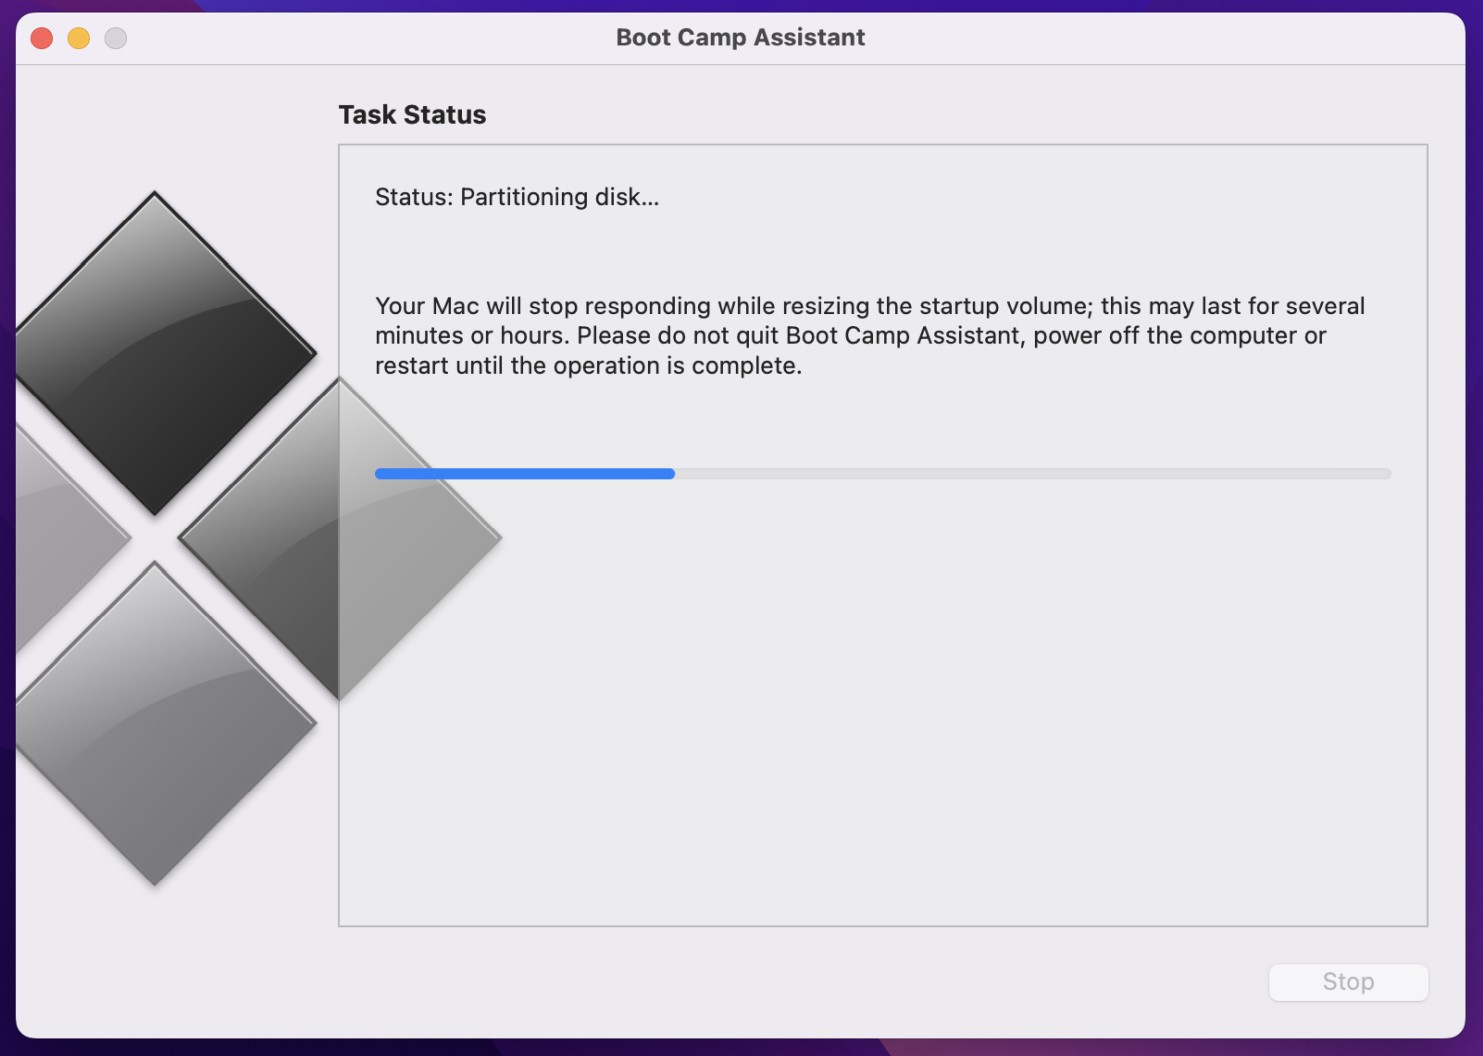
Step 10In the next step, the installer would partition the drive by shrinking current macOS partition.
It might take a while to complete this process depending on the size of your disk and amount of data. |
|
|
|
|
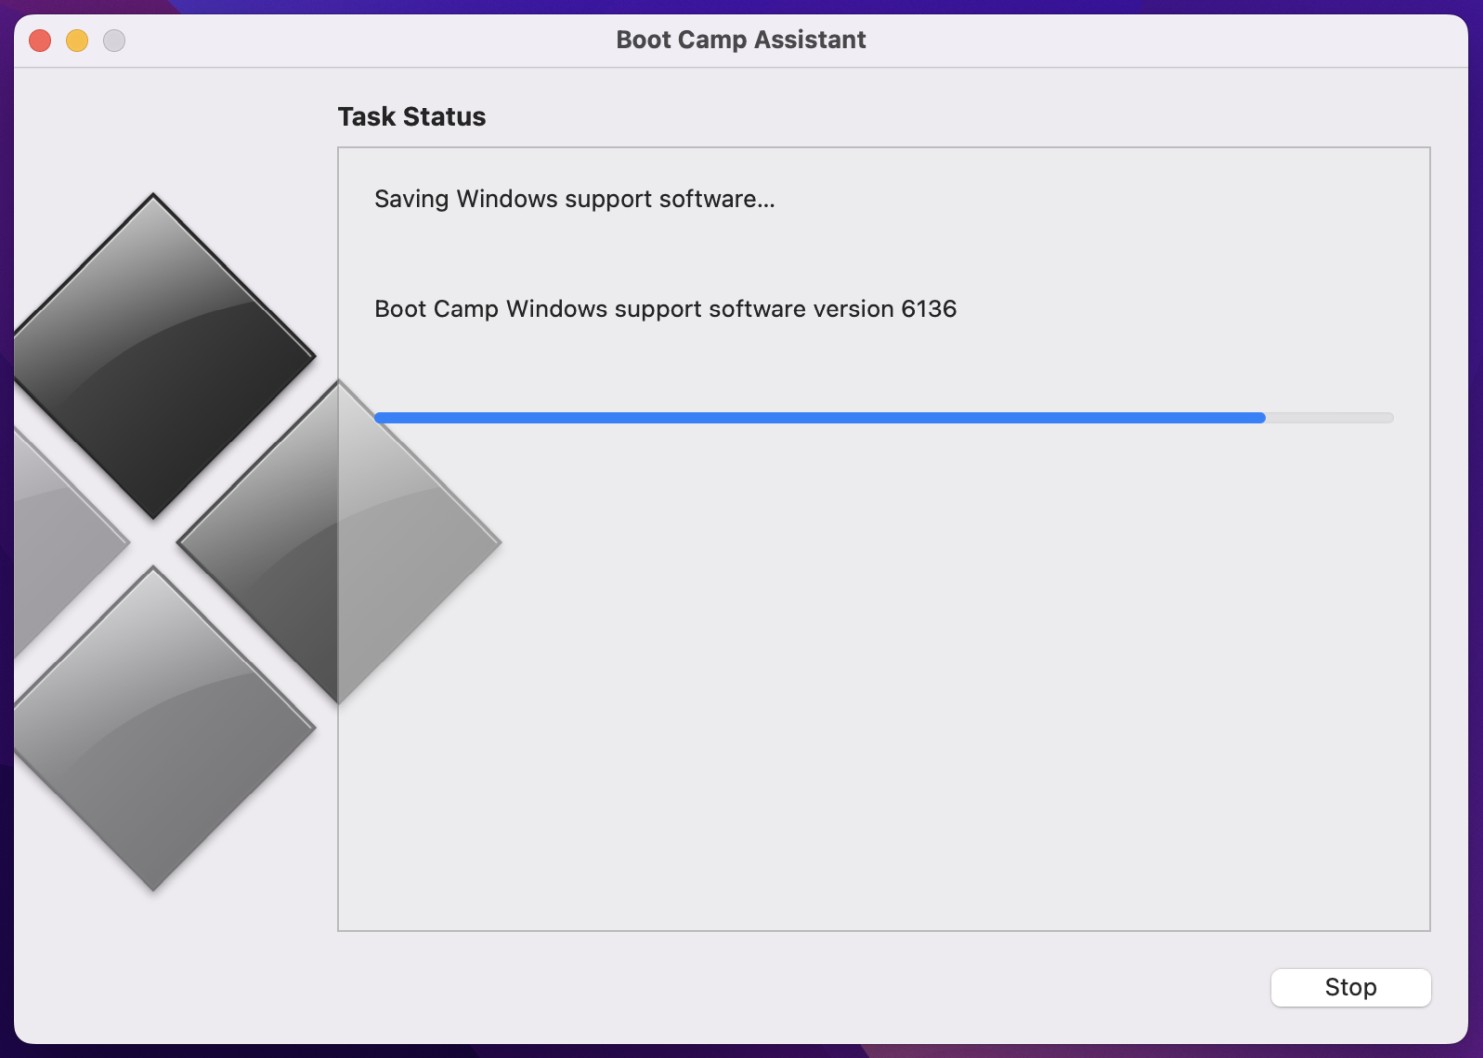
Step 11Finally it will save BootCamp assistant on your new Windows partition so it could be launched post Windows 10 installation.
|
|
|
|
|
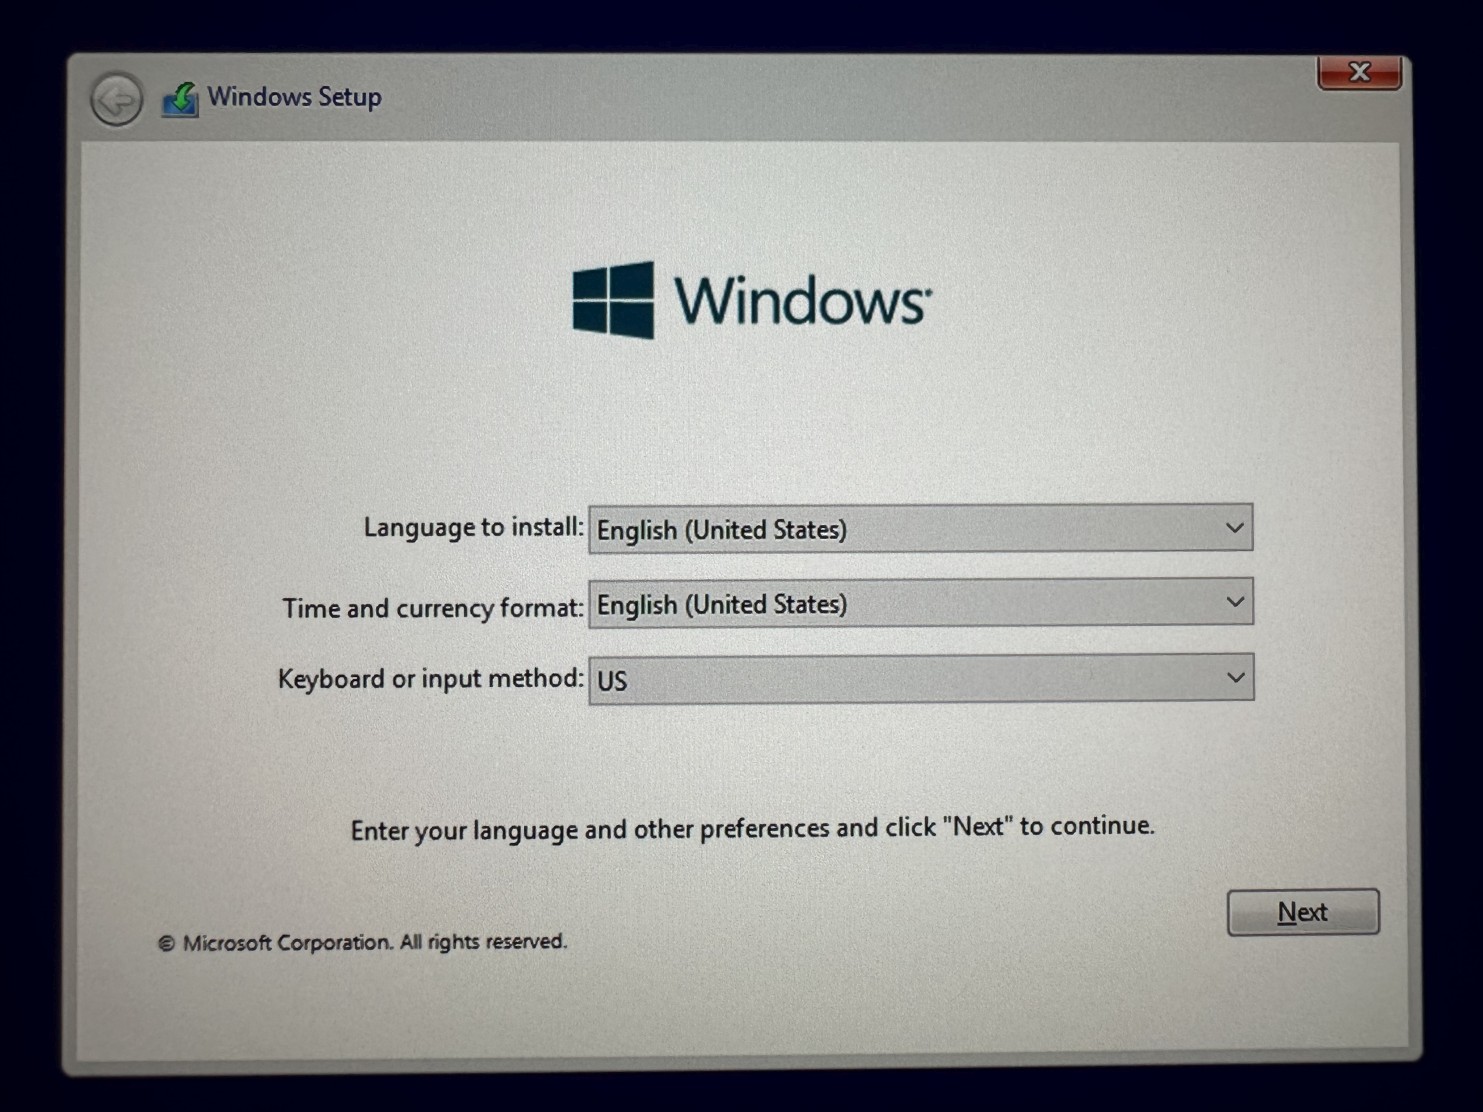
Step 12Choose your language to install, time, currency and keyboard layout and click Next button. |
|
|
|
|
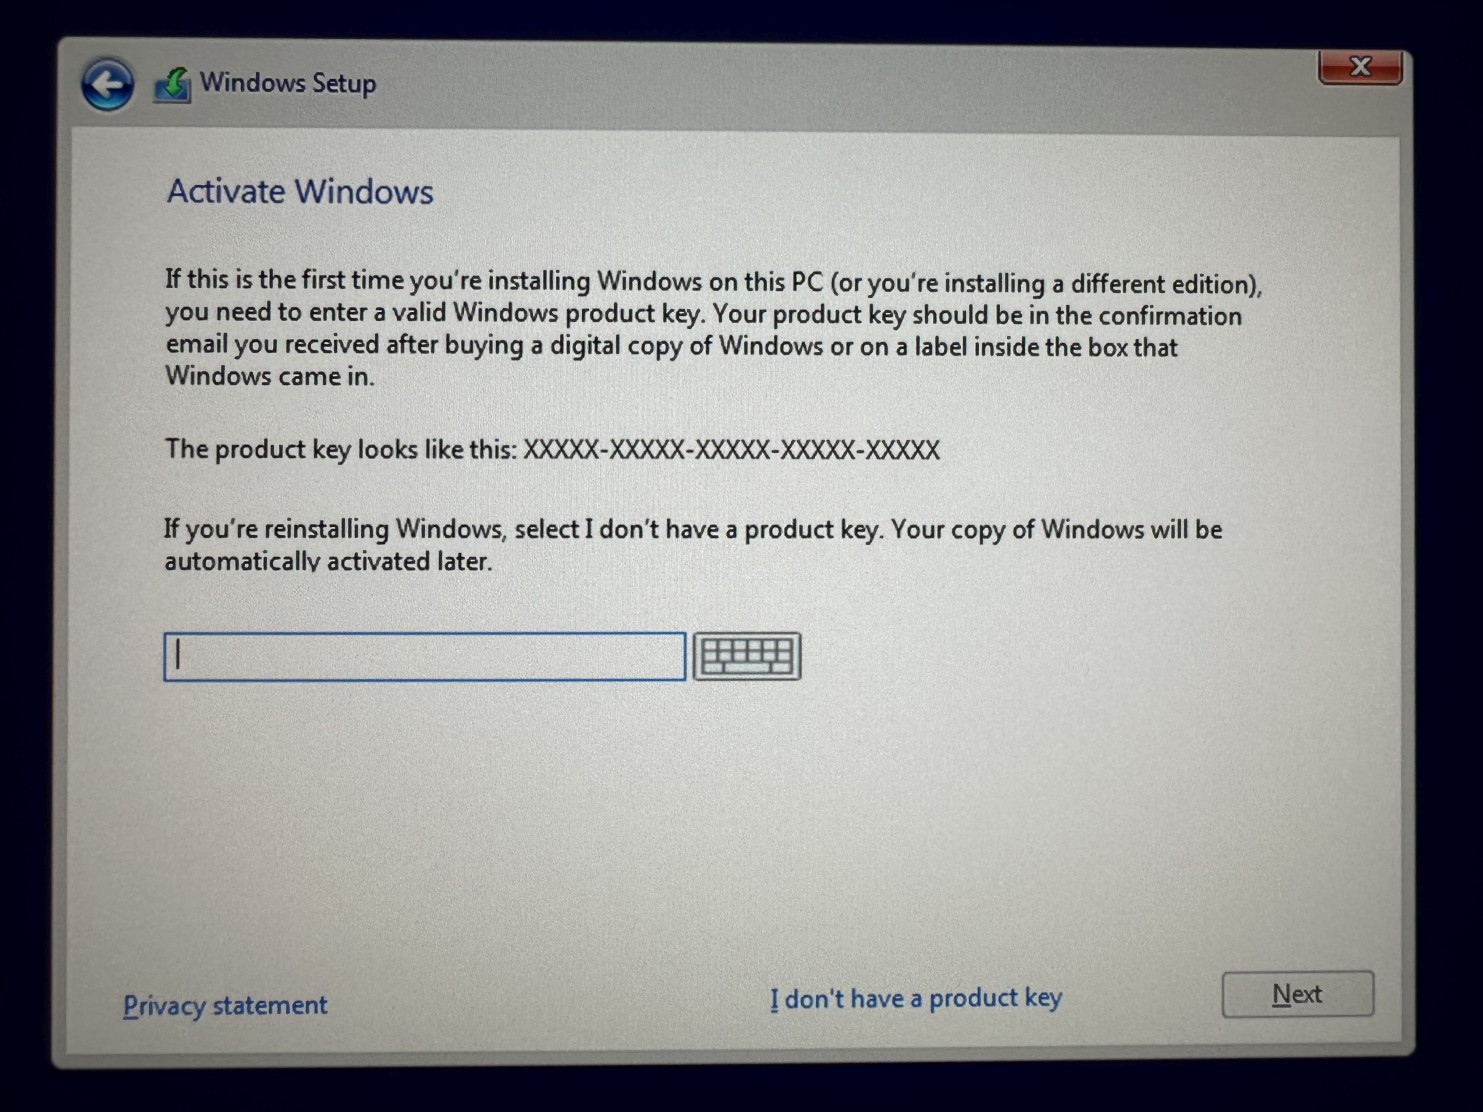
Step 13Enter your Windows 10 product key and click Next button. If you don't have it yet, simply click I don't have a product key. You will be able to enter your Windows 10 product key later and activate Windows. |
|
|
|
|
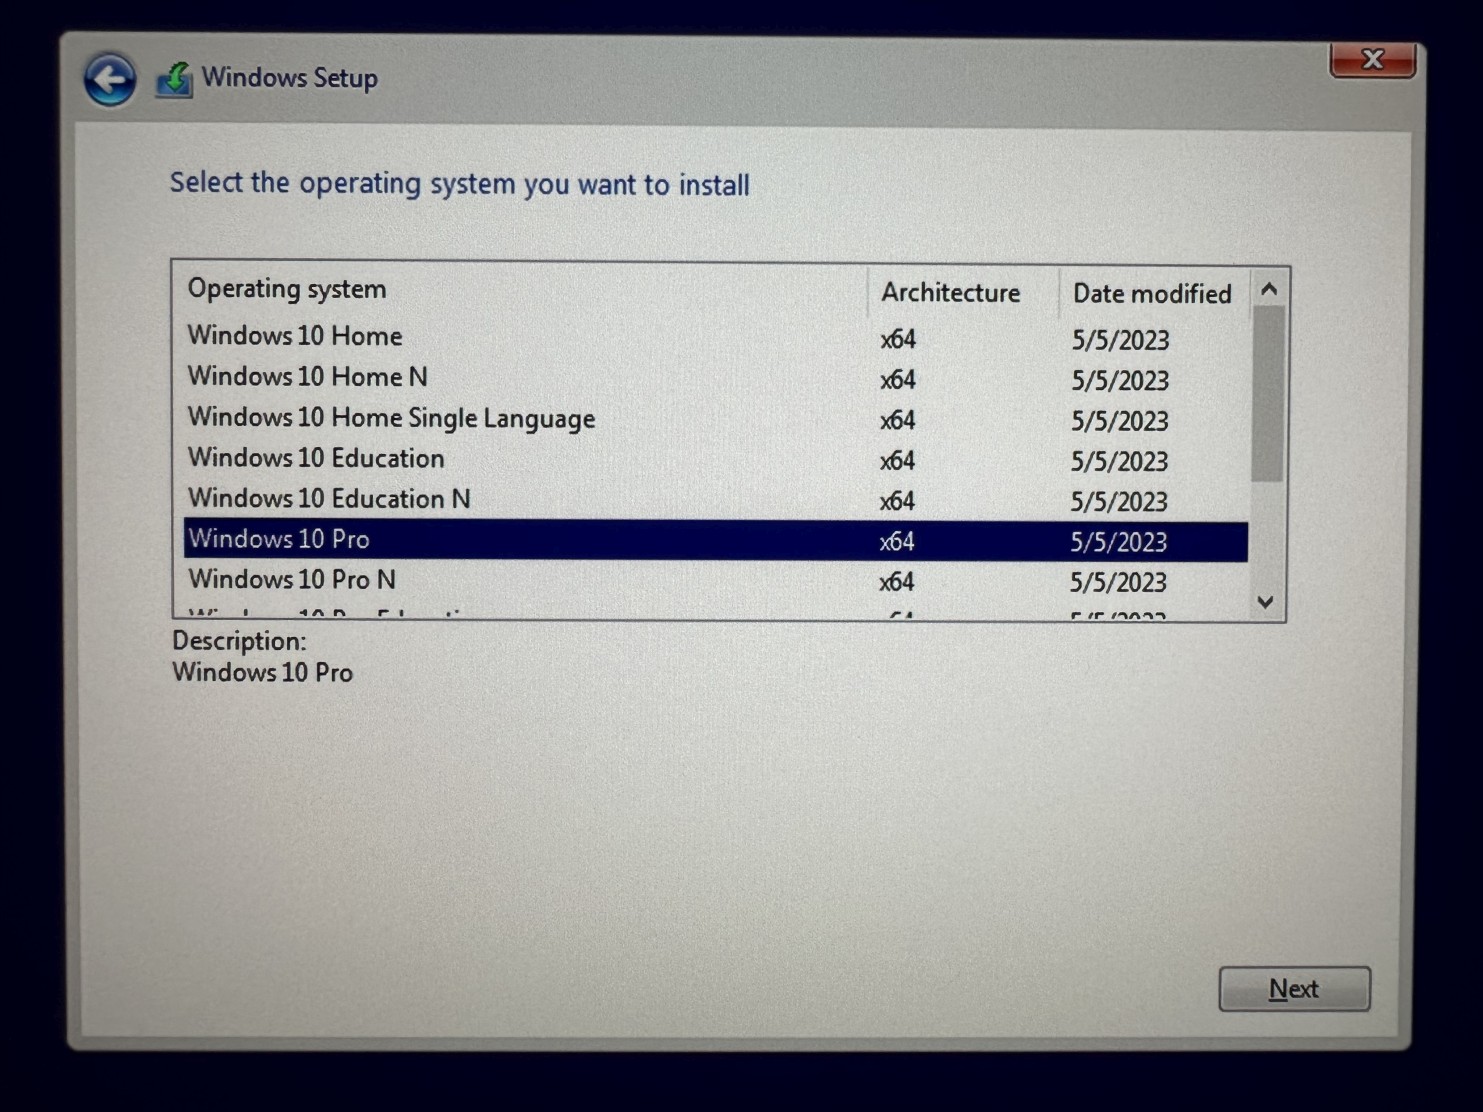
Step 14If you haven't entered your Windows 10 product key please choose a Windows version you plan to buy and click Next button to continue. |
|
|
|
|
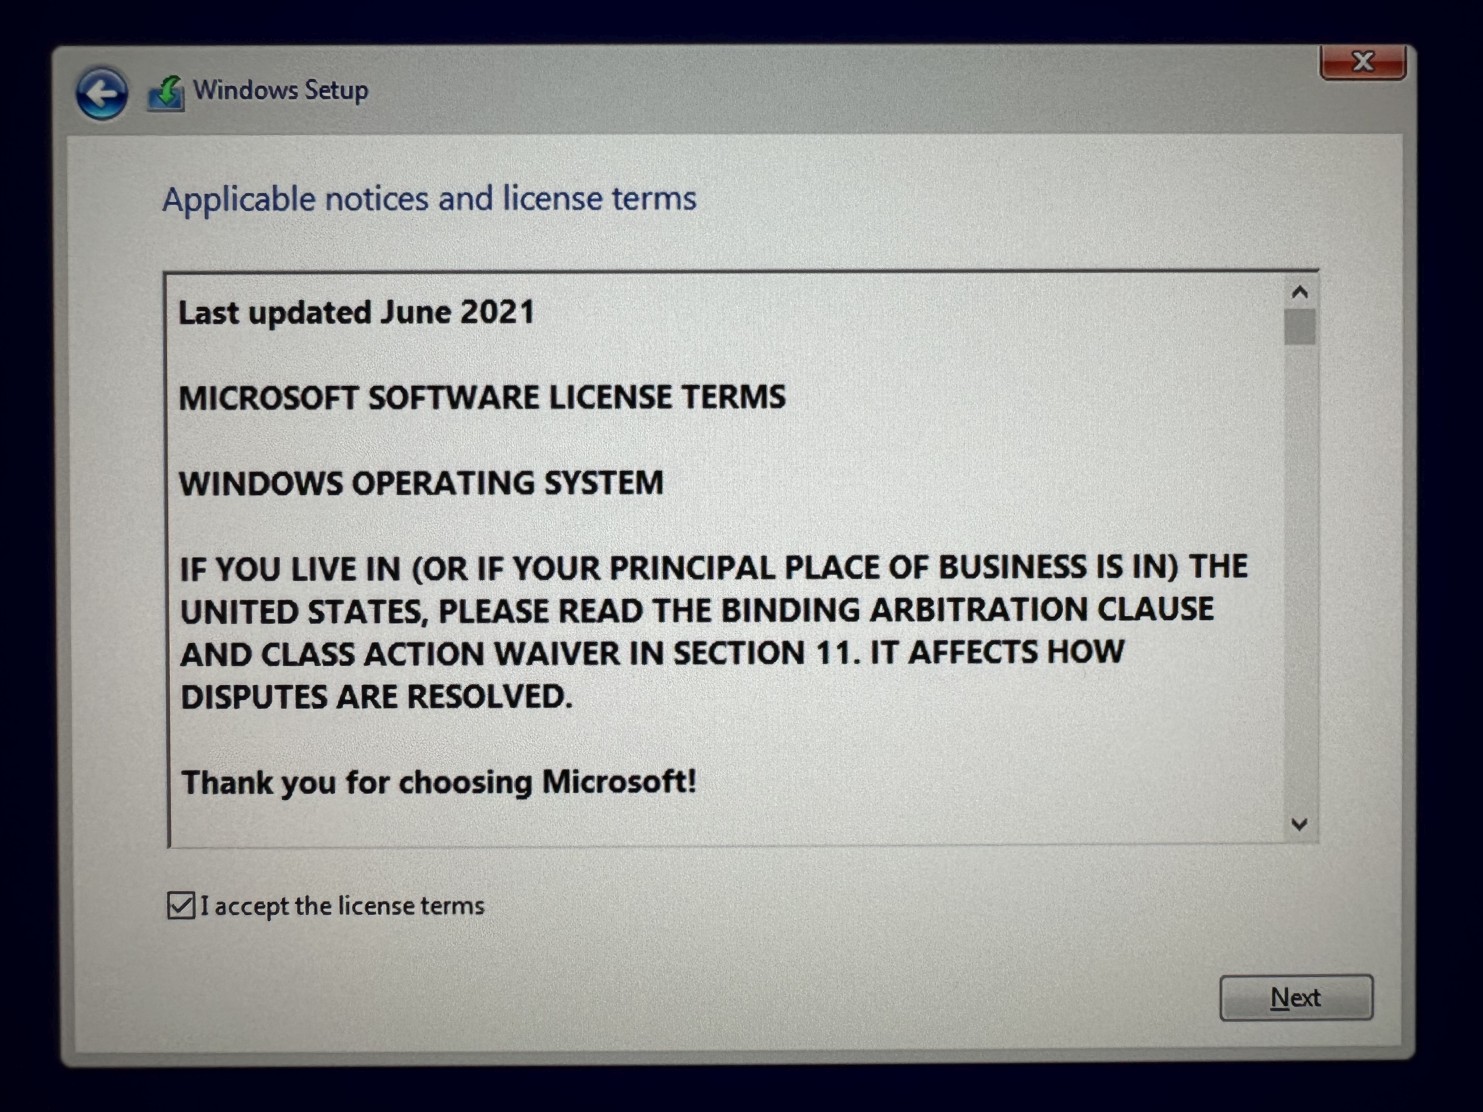
Step 15Read licence terms, then check the checkbox I accept the licence terms and click Next button to continue. |
|
|
|
|
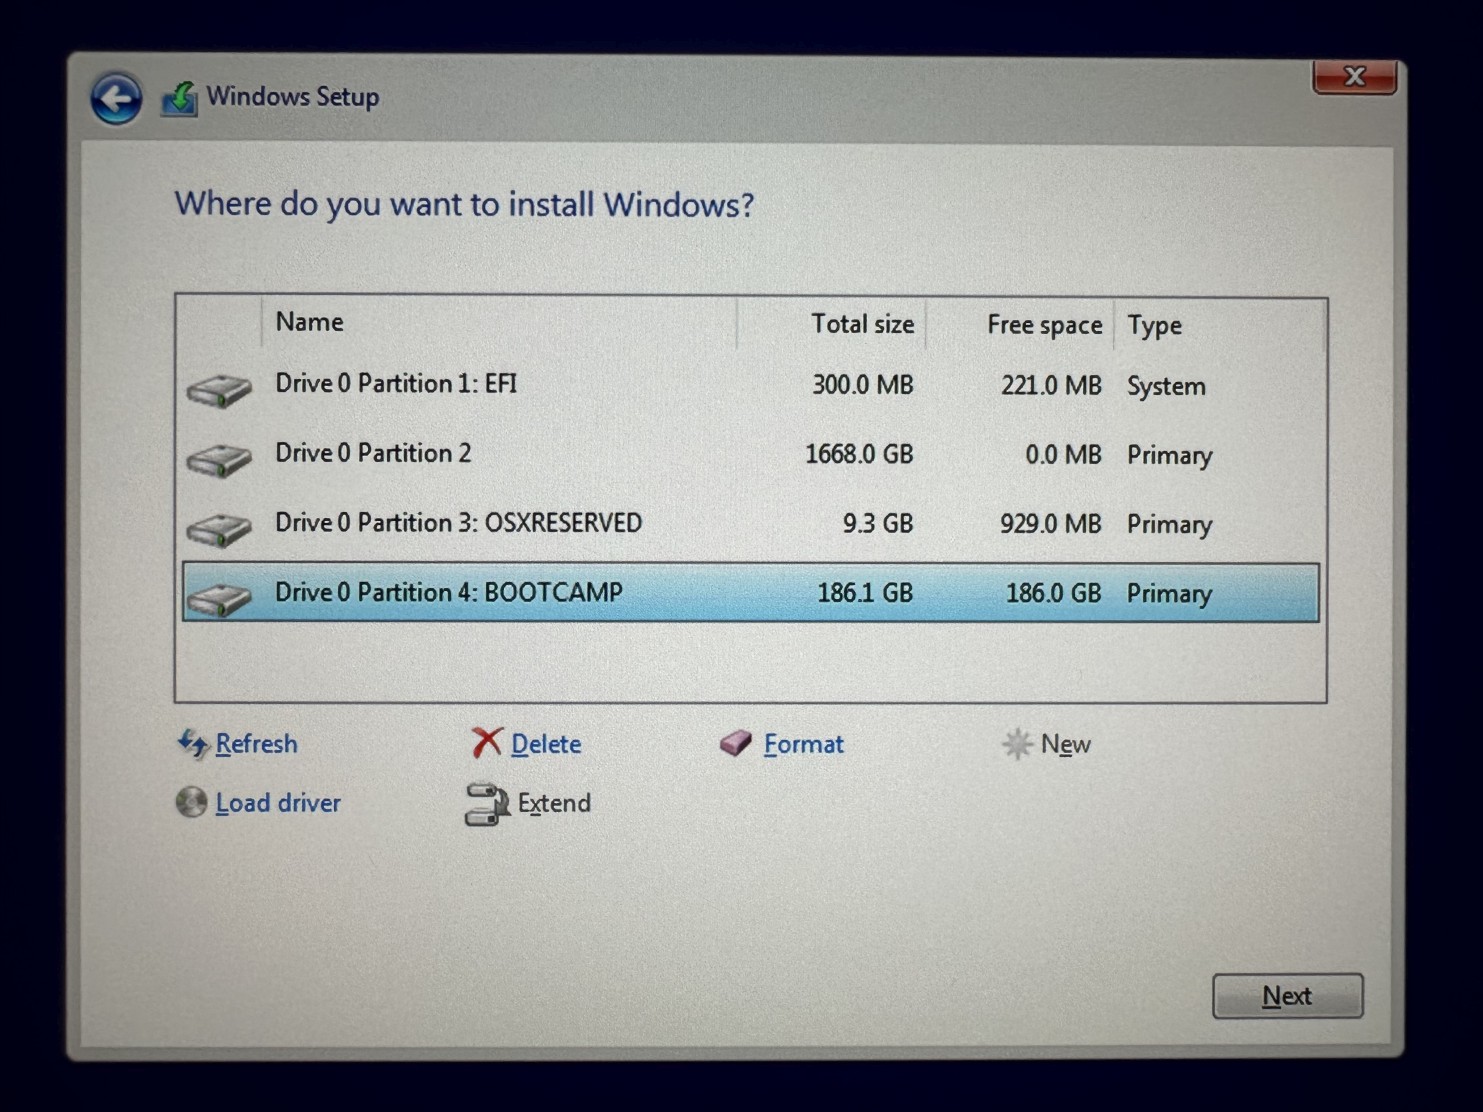
Step 16Choose previously created partition named BOOTCAMP and click Next button to start the installation. |
|
|
|
|
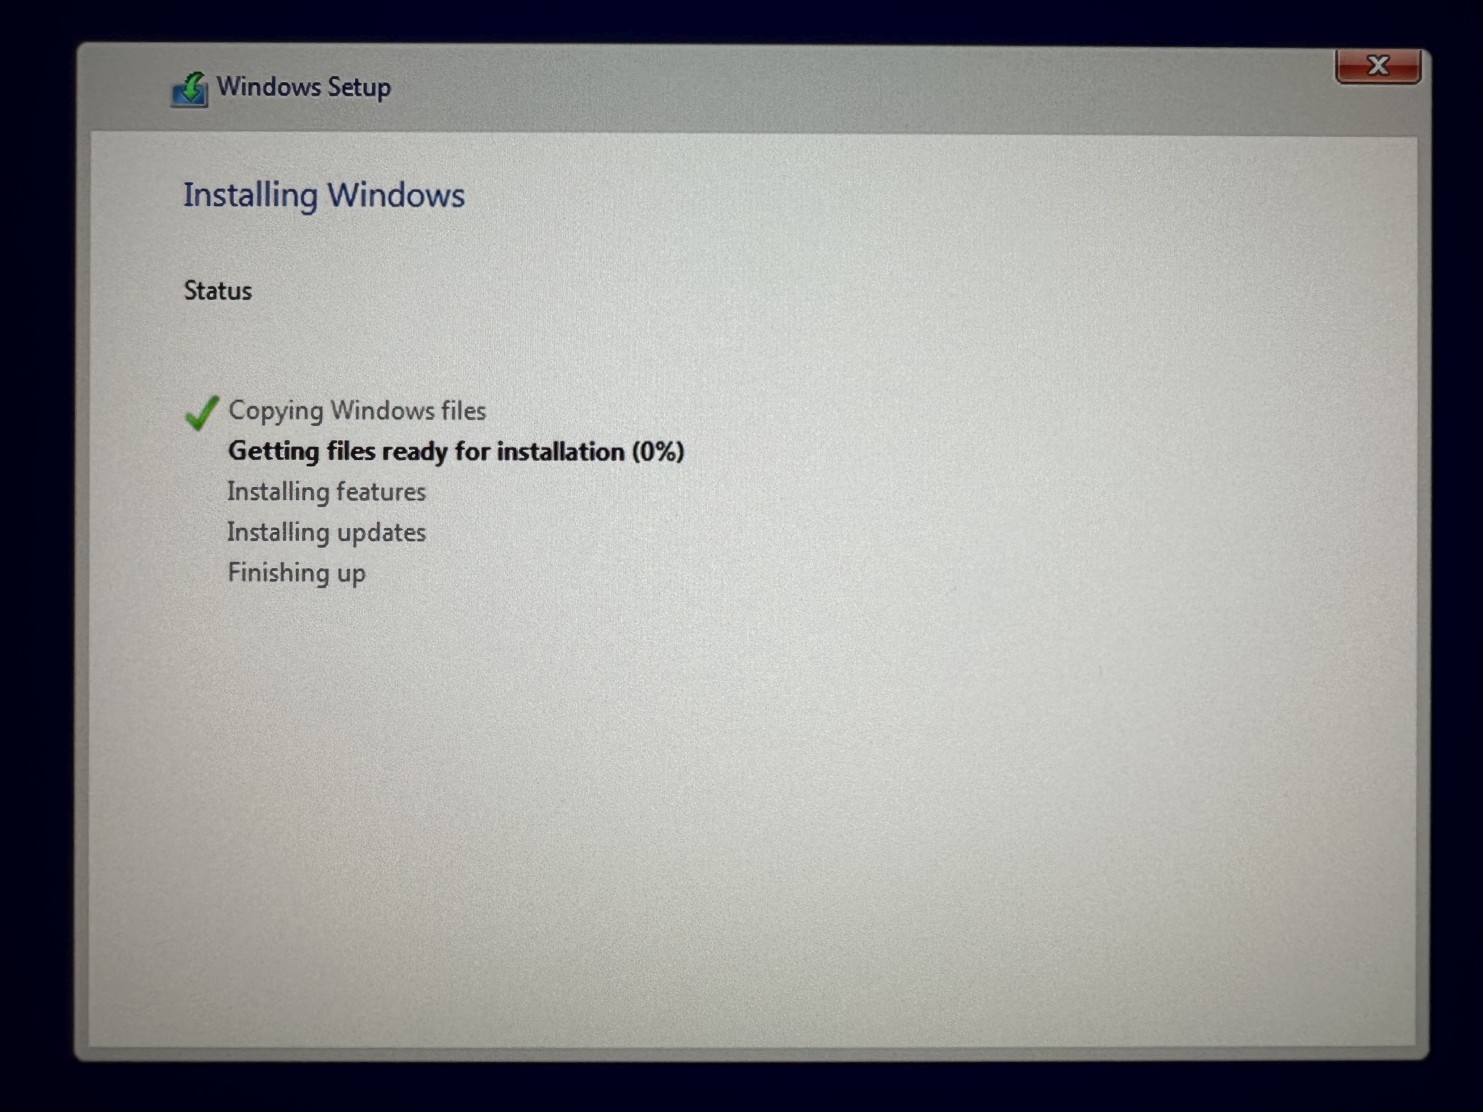
Step 17Installing Windows will take around 15-30 minutes depening on the speed of your hard drive. |
|
|
|
|
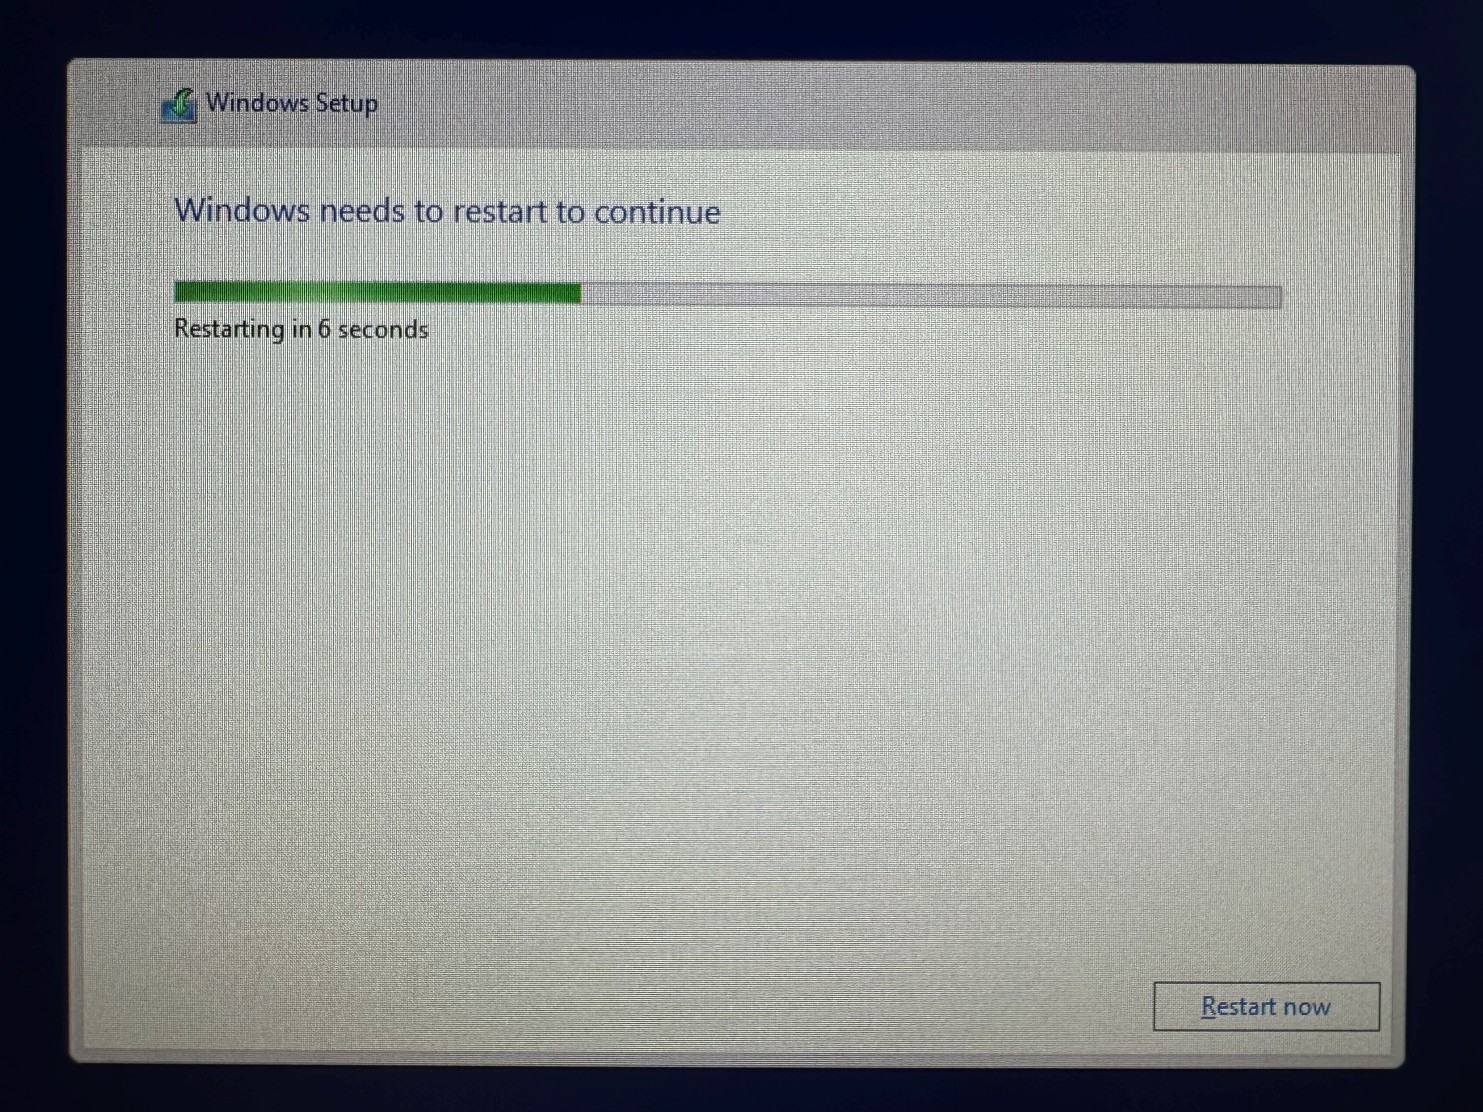
Step 18Wait a few seconds for automatic reboot or click Restart now button if you don't like to wait. |
|
|
|
|
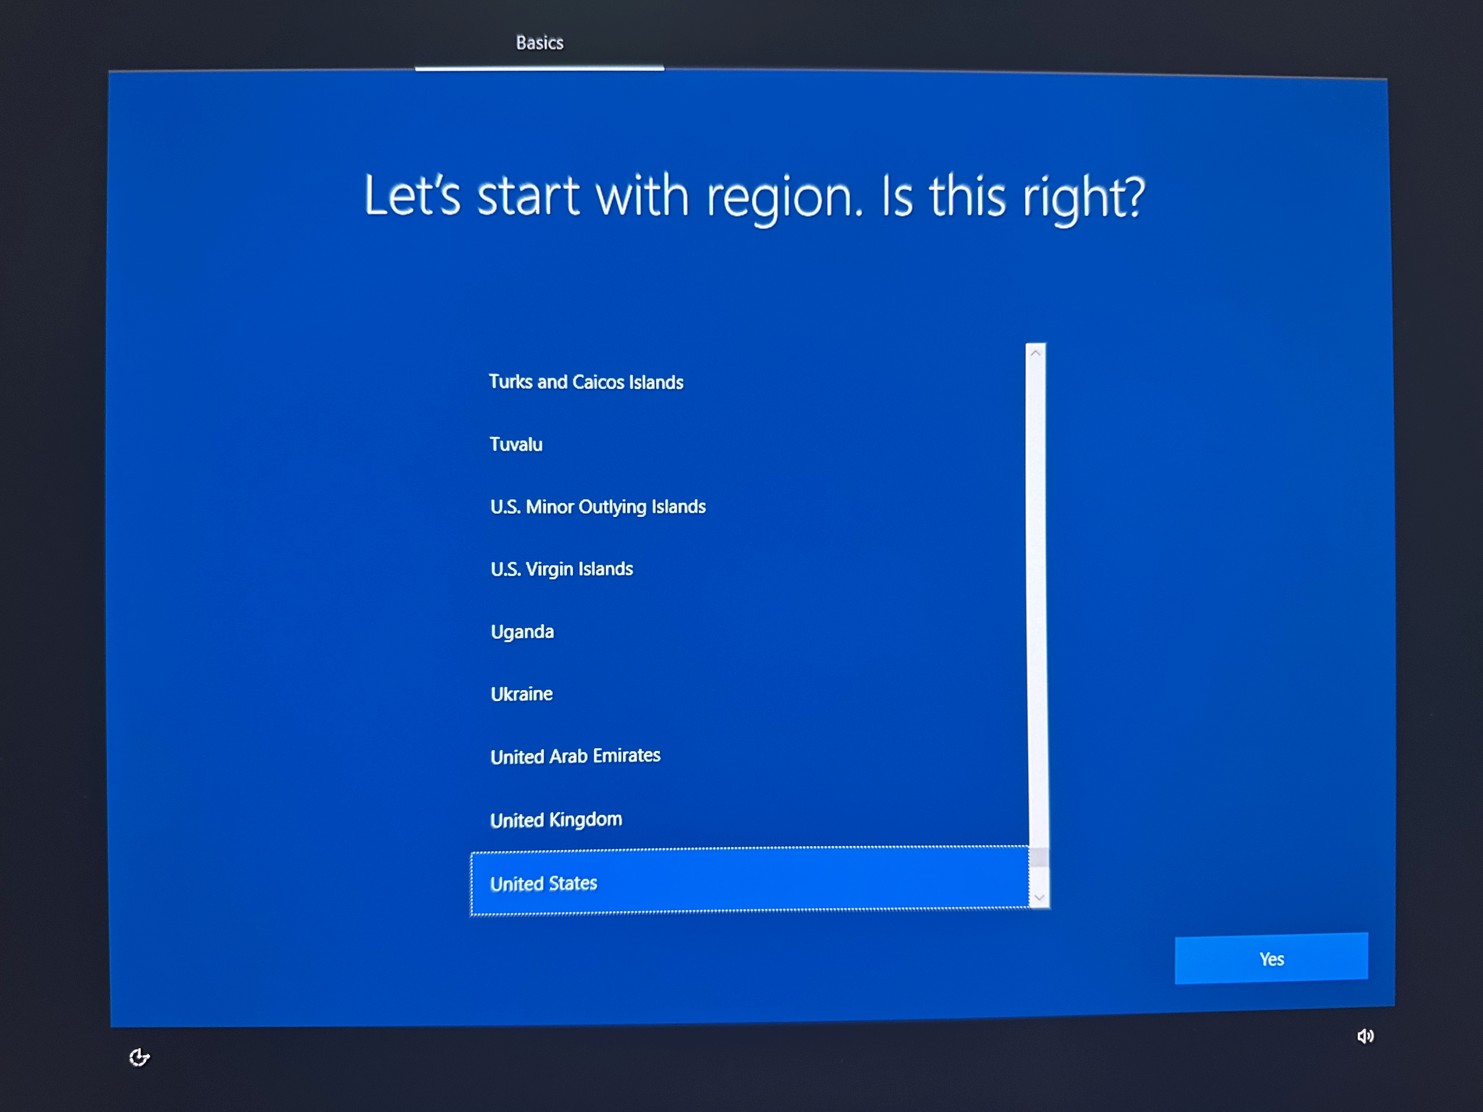
Step 19Now answer all installer questions starting with region and you will be presented with Windows 10 desktop. |
|
|
|
|
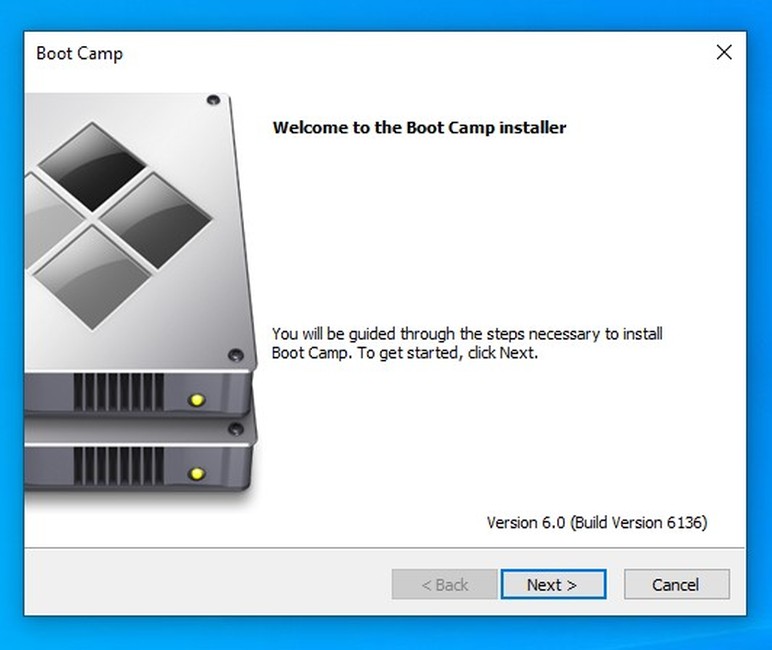
Step 20Apple BootCamp assistant will start automatically. Click Next button to continue. |
|
|
|
|
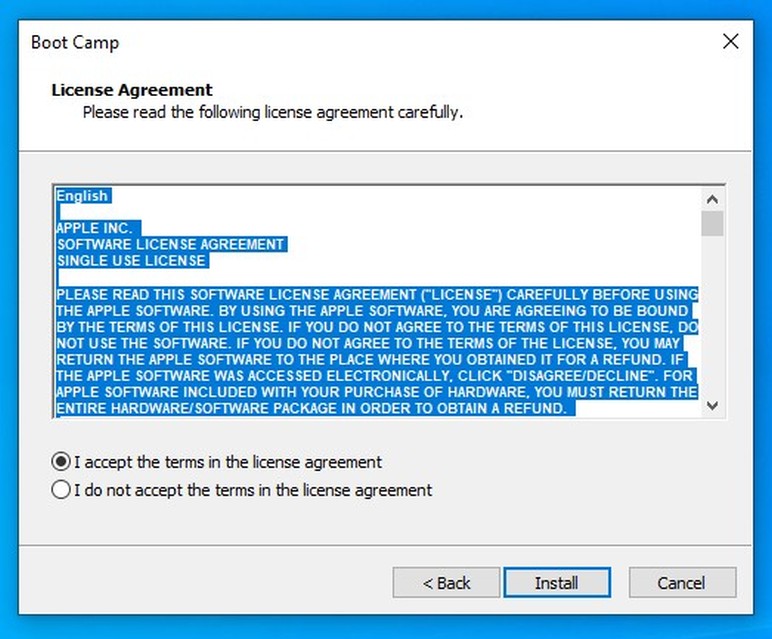
Step 21Read the licence agreement and click radio button next to "I accept the terms in the licence agreement" and then Install button to start the installation. |
|
|
|
|
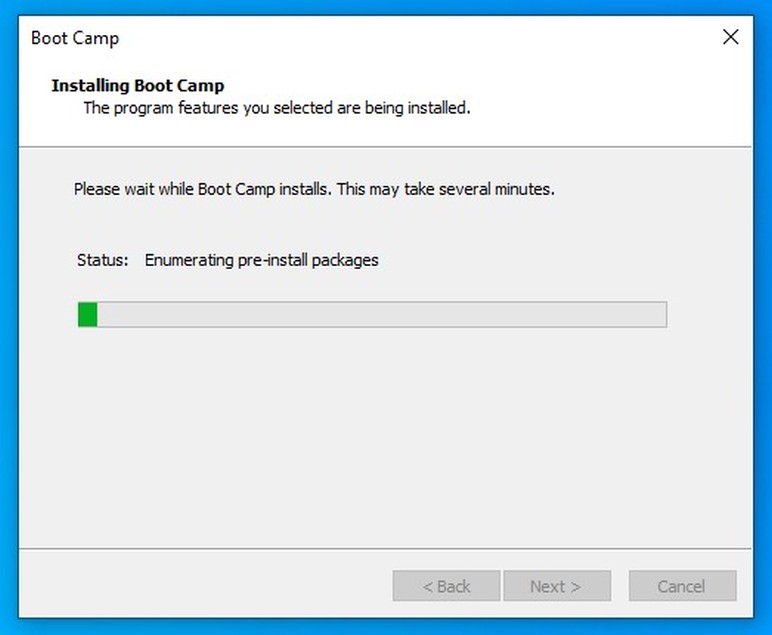
Step 22It will take several minutes to install all drivers and Apple BootCamp software. Please note your screen might go on and off during this time. |
|
|
|
|
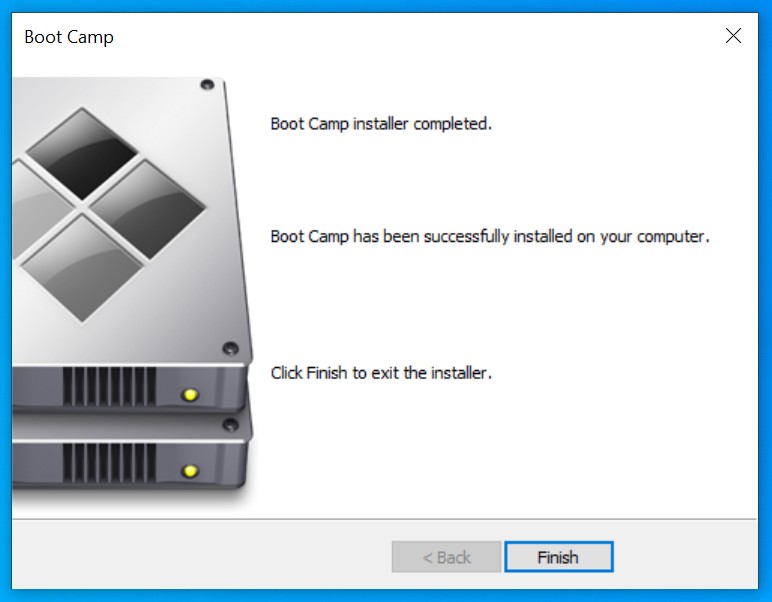
Step 23Click Finish button to finish the installation. |
|
|
|
|
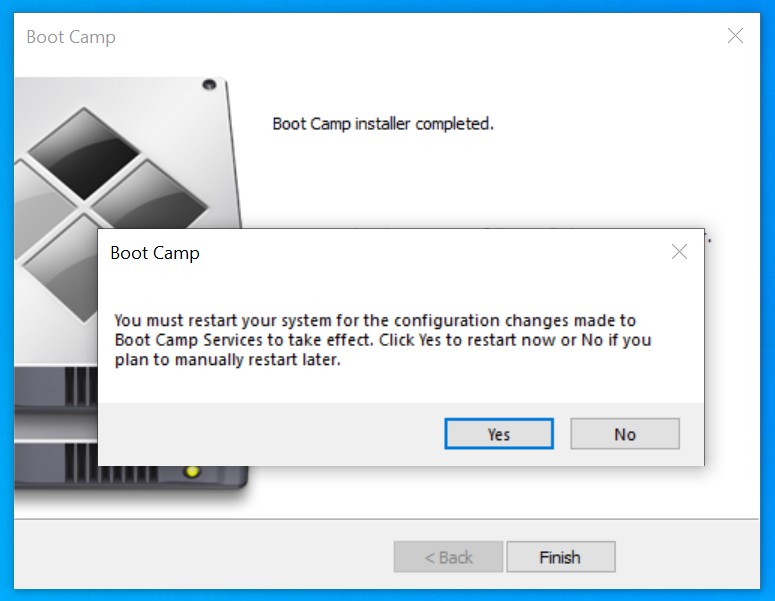
Step 24Click Yes button to restart the computer . |
|
|
|
|
|
|
|
|
|
|
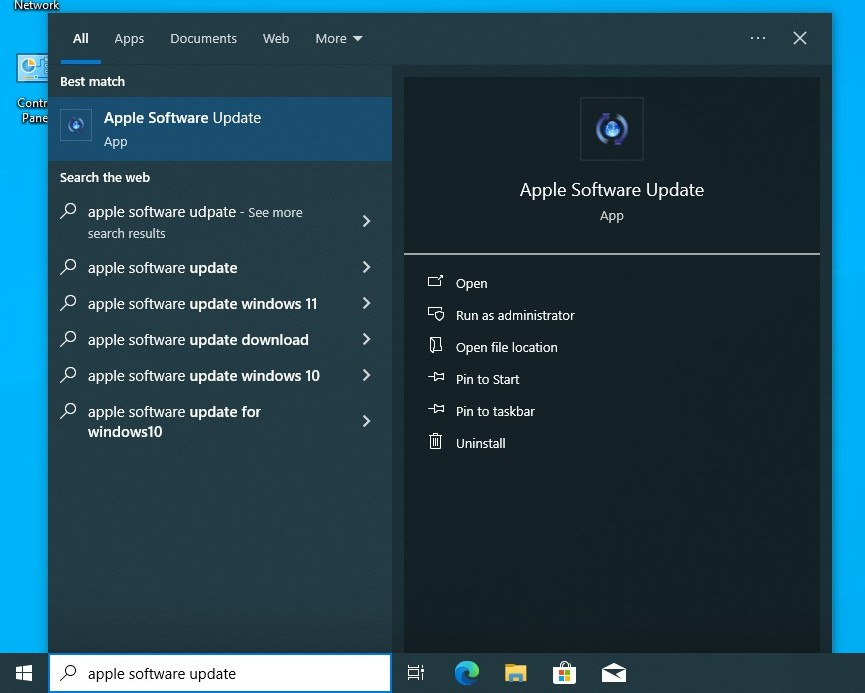
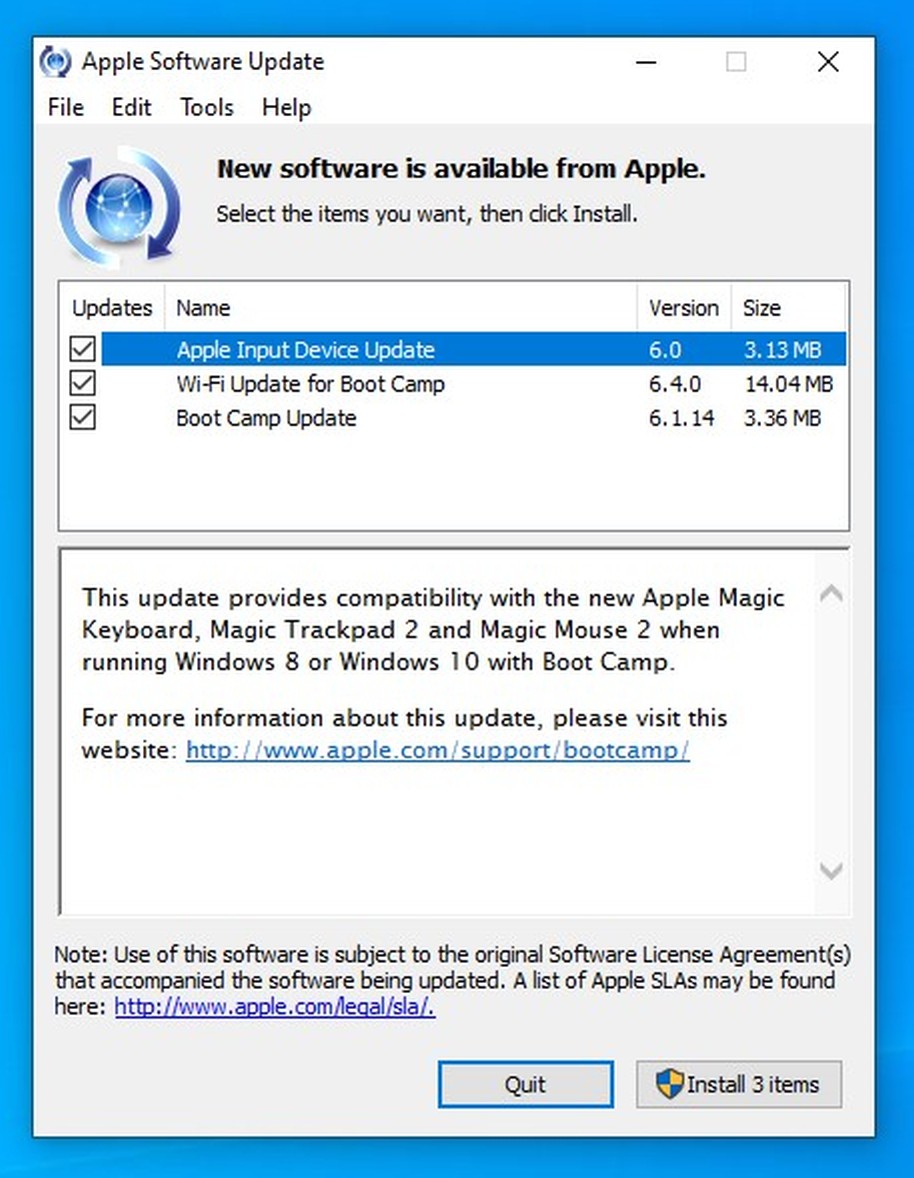
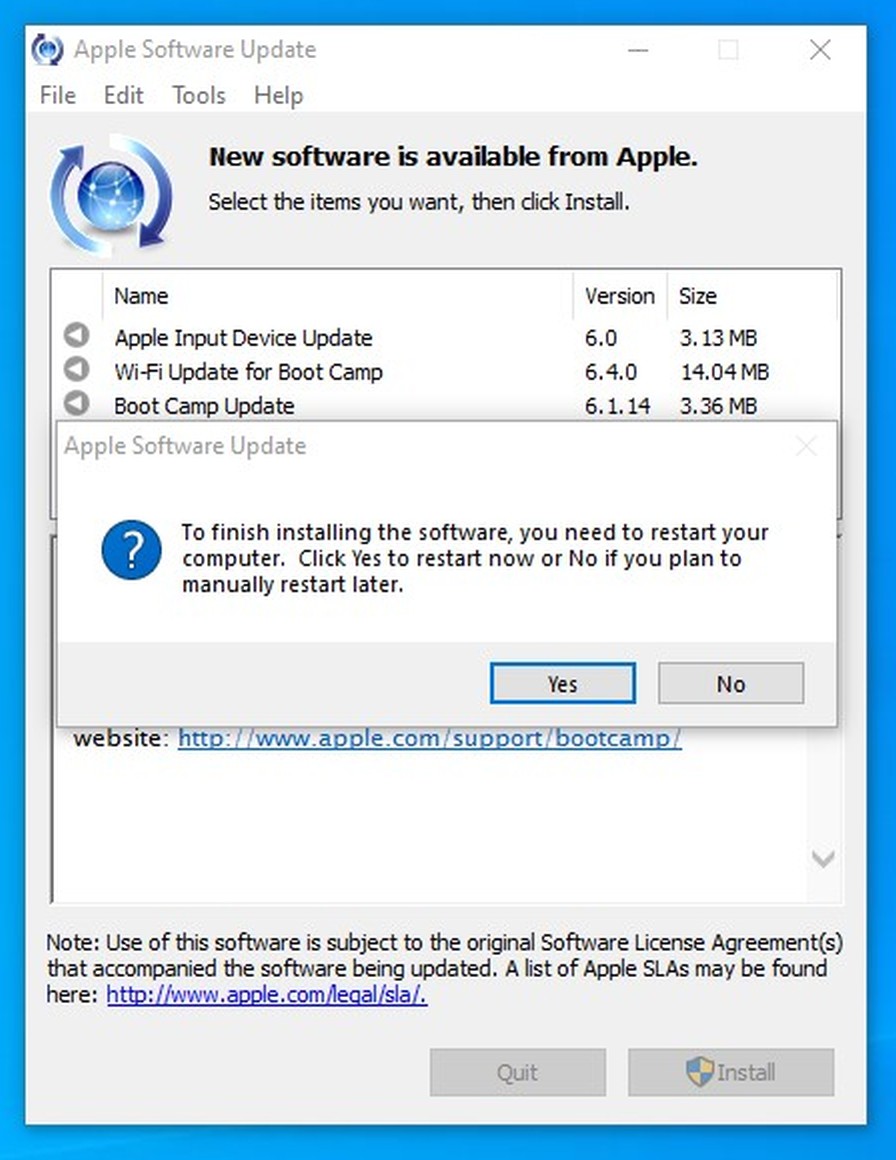
Step 25Now we need to update Apple Boot Camp software to version 6.1.14 as well as input driver and updated Wi-Fi driver.
Type "apple software update" in the search bar and click the first result to launch updater.
Please note: If you have an old Apple Cinema HD Display using DVI connector and your brightness OSD (onscreen overlay) is working properly, do not upgrade to this version or any later versions as it will stop working. Other updates can be installed without any worries. |
|
|
|
|
Step 26Make sure all updates are selected and click Install 3 items button to continue. |
|
|
|
|
Step 27Click Yes button to restart the computer. |
|
|
|
|
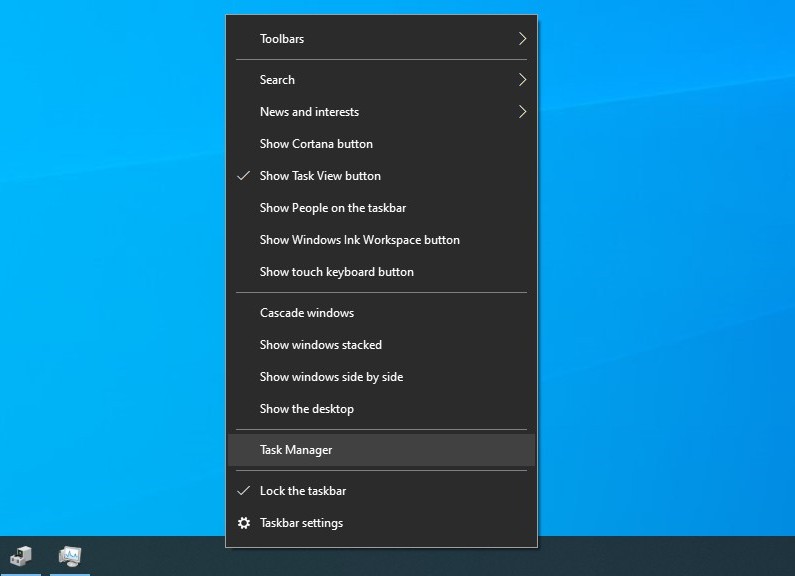
Step 28Now we need to stop BootCamp process first before manually updating it to the final version.
Right click on the desktop and choose Task Manager from the context menu. |
|
|
|
|
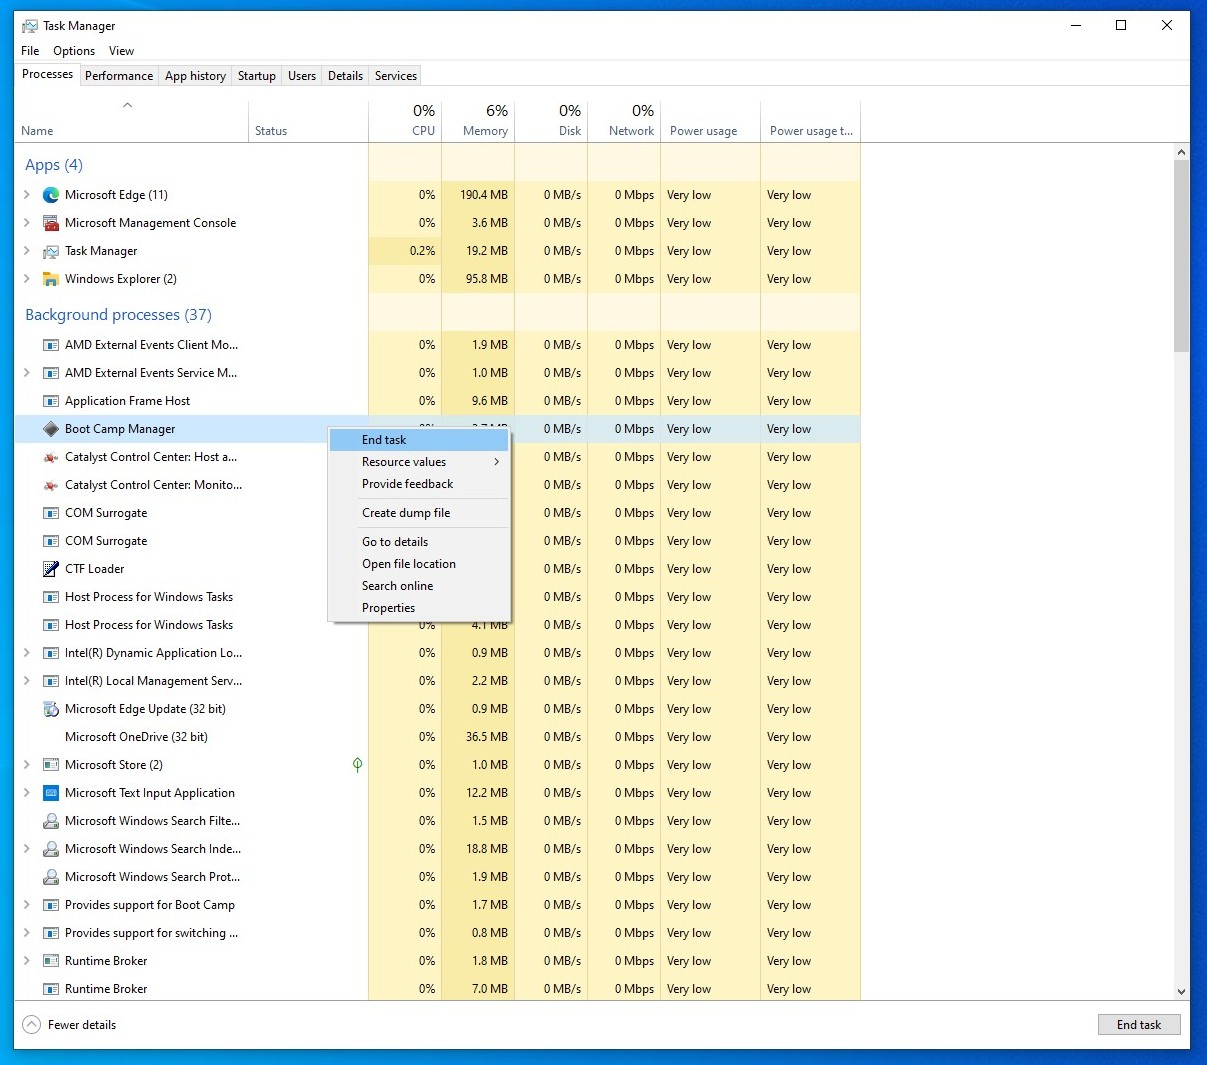
Step 29In Processes tab right click on Boot Camp Manager and choose End task to stop Boot Camp process. |
|
|
|
|
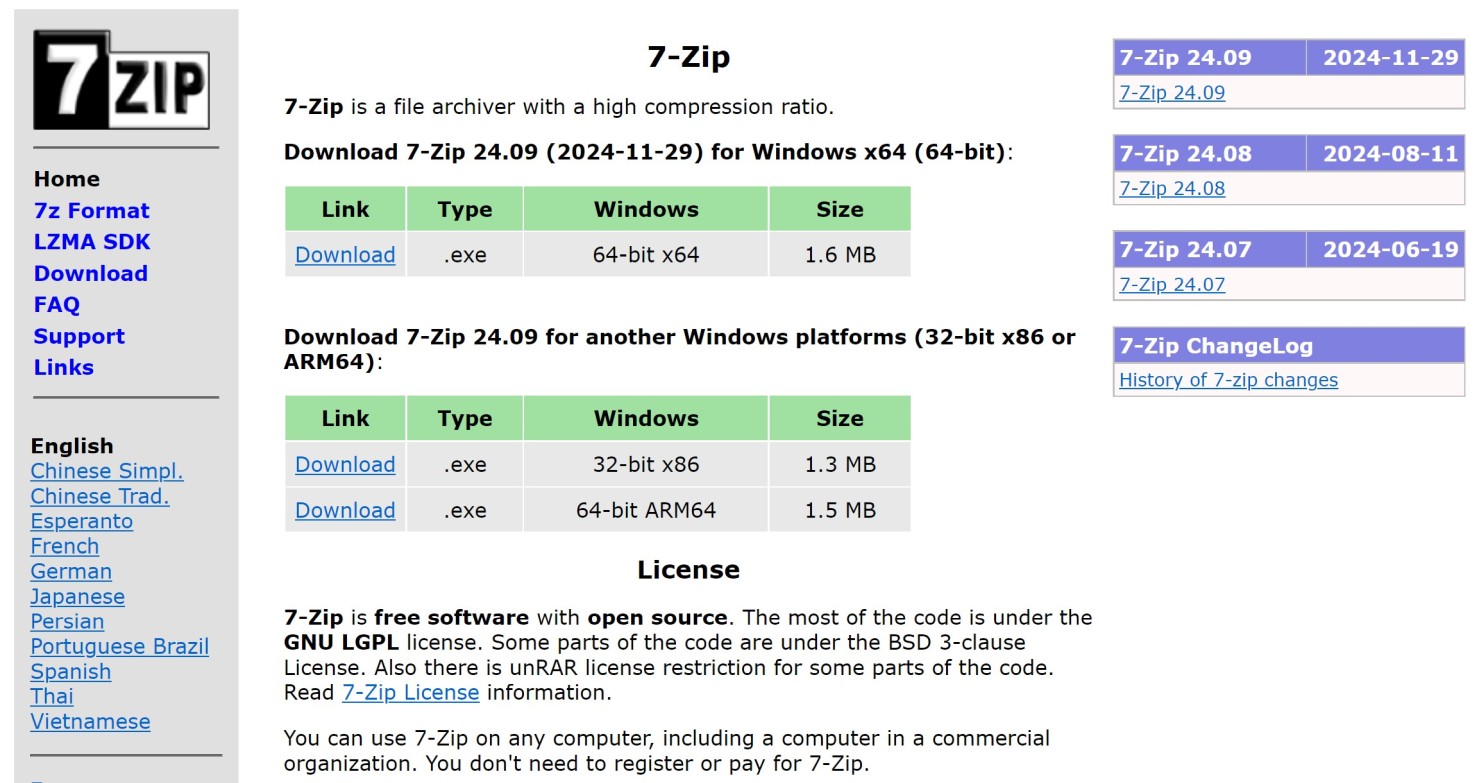
Step 30To unpack another BootCamp drivers we need free 7-Zip software.
Please open 7-Zip website in any web browser: https://7-zip.org
Click Download link in Windows x64 (64-bit) section to download it. Then run the downloaded file. |
|
|
|
|
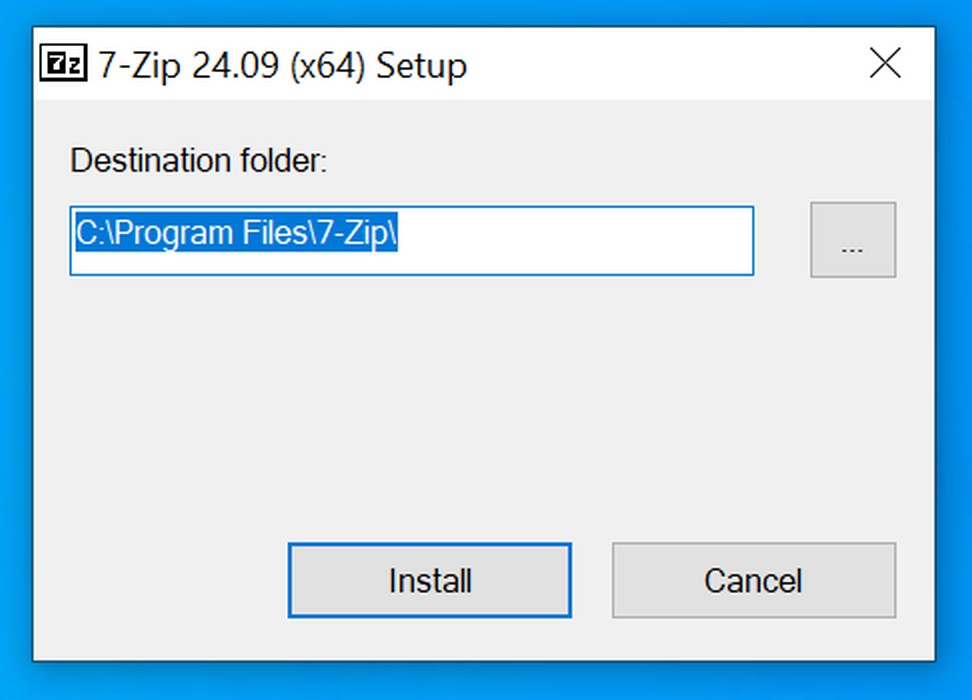
Step 31Leave the default destination folder as it and click Install button to continue.
|
|
|
|
|
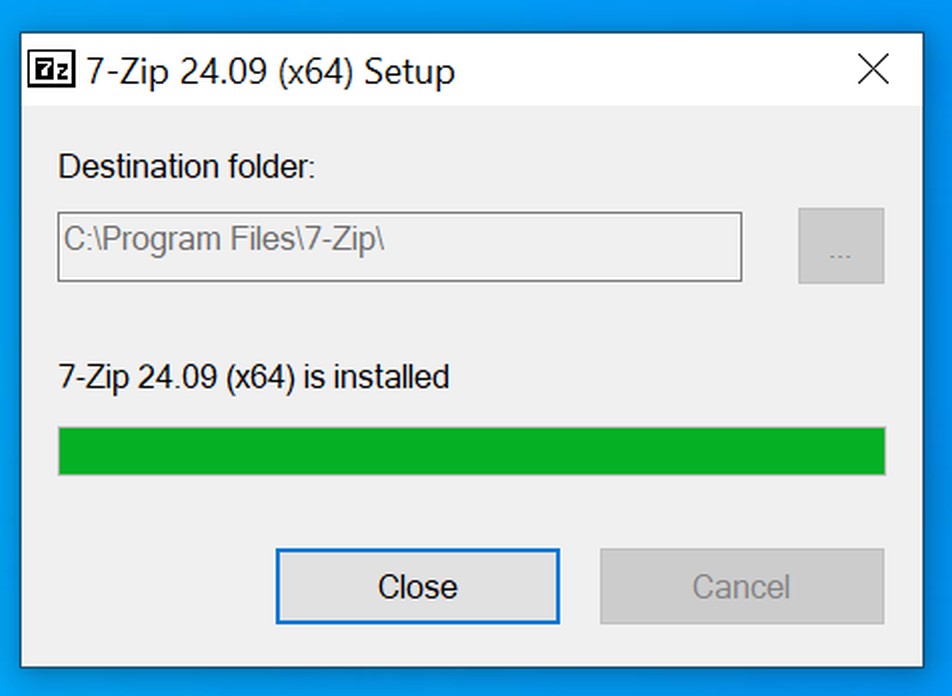
Step 32Click Close button to finish the installation of 7-Zip software.
|
|
|
|
|
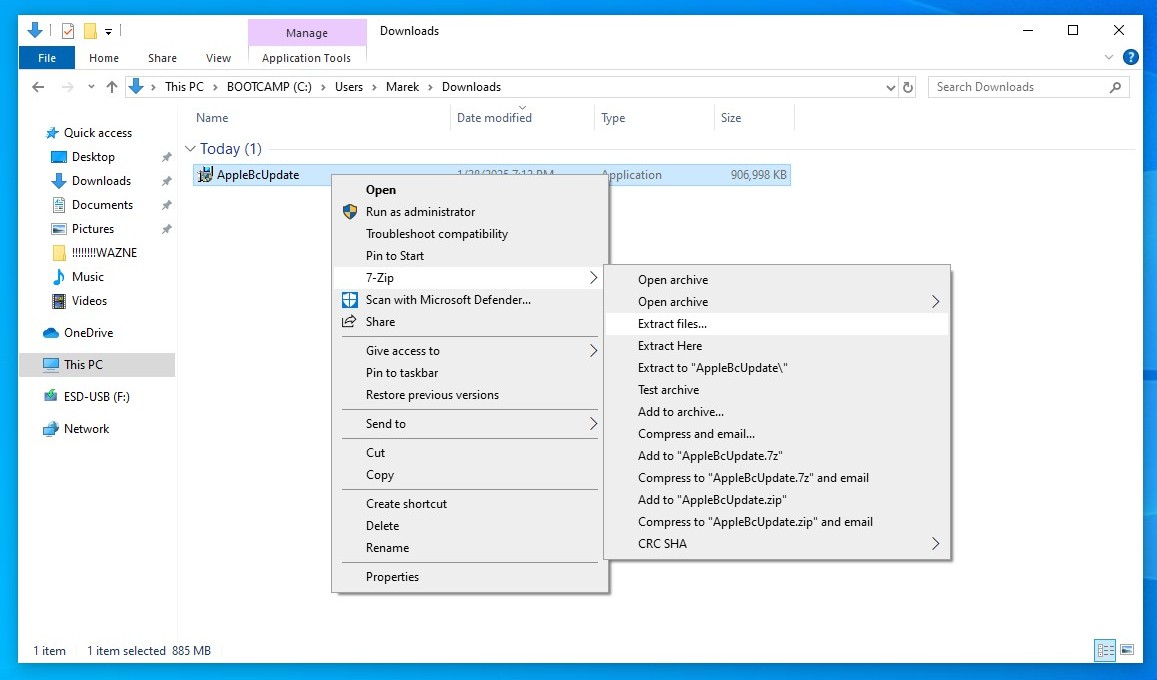
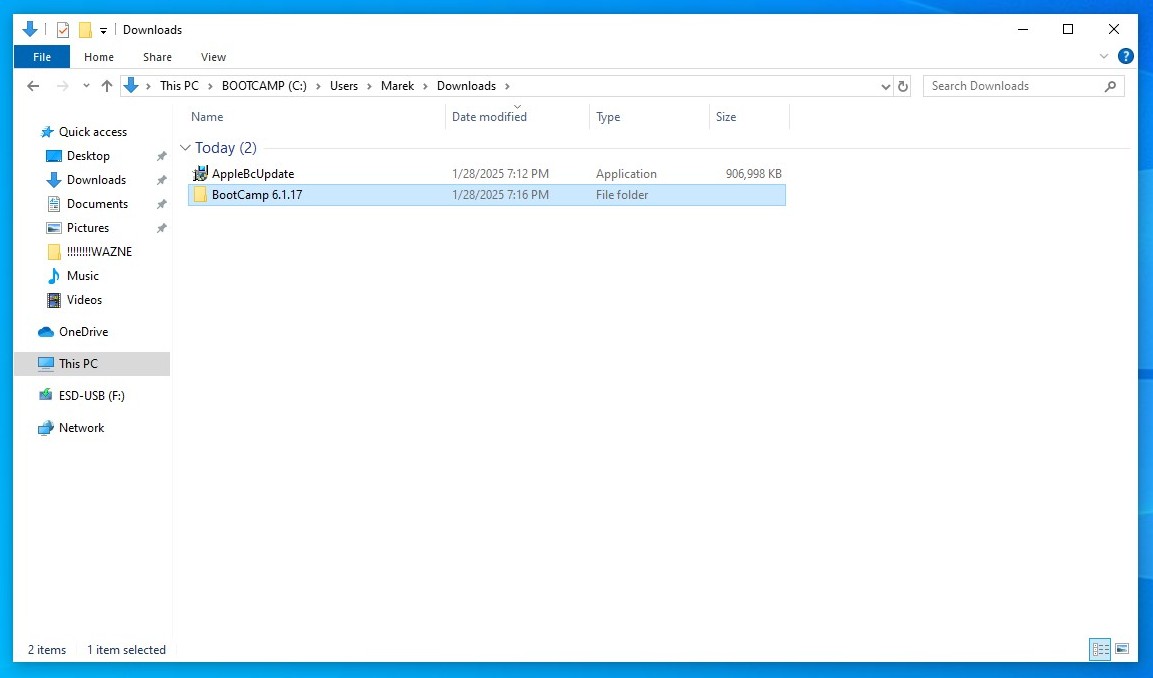
Step 33Download Apple BootCamp version 6.1.17 from here. This will add useful features like automatic dimming on Apple Studio Display and Apple Pro Display XDR.
Go to your Downloads folder and right click on AppleBcUpdate.exe file. Select 7-Zip, then Extract files... from the context menu.
|
|
|
|
|
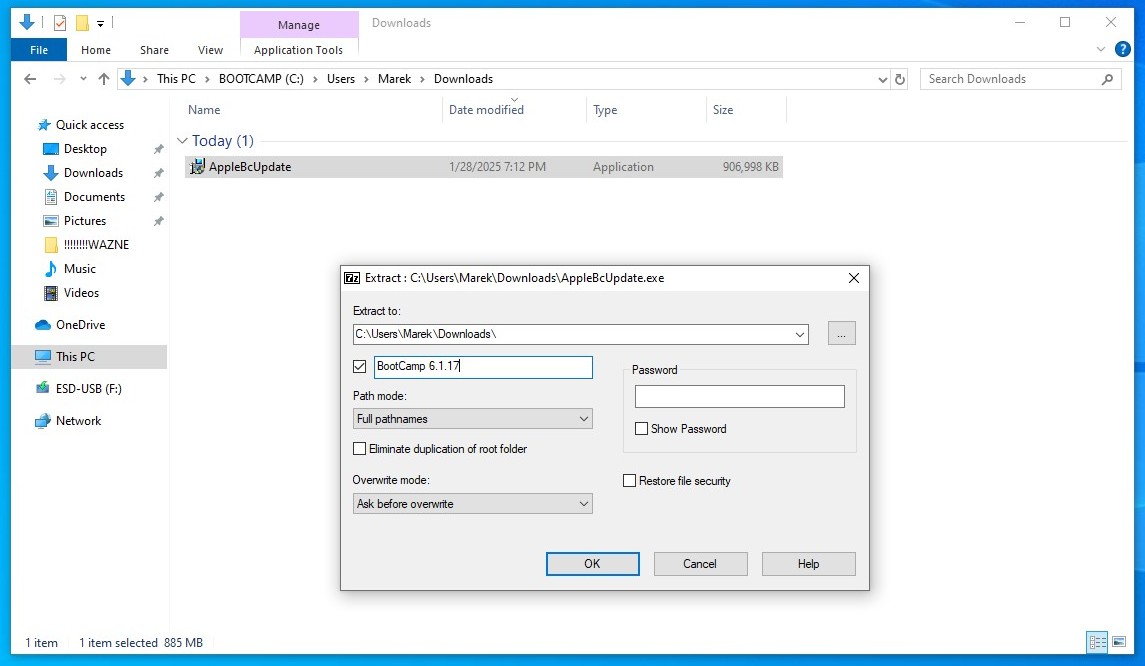
Step 34Rename the default name to BootCamp 6.1.17 in the second text field and click OK button.
|
|
|
|
|
Step 35You should have BootCamp 6.1.17 folder ready.
|
|
|
|
|
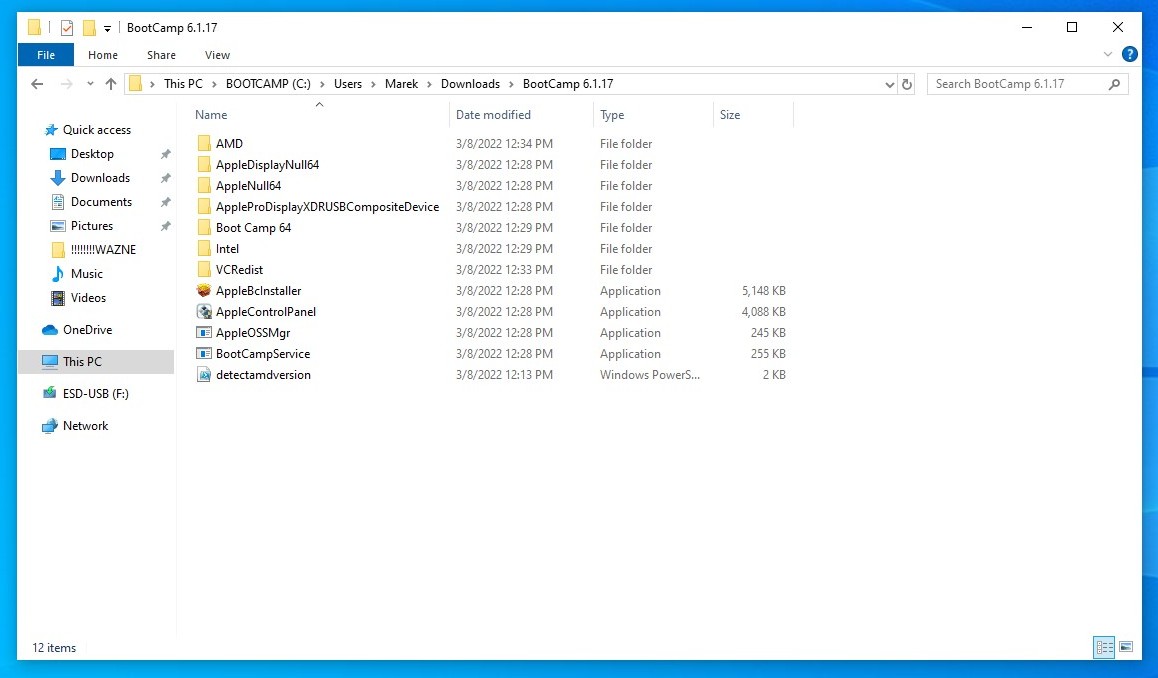
Step 36Inside this folder you will find some subfolders and files. We will only need some of them.
|
|
|
|
|
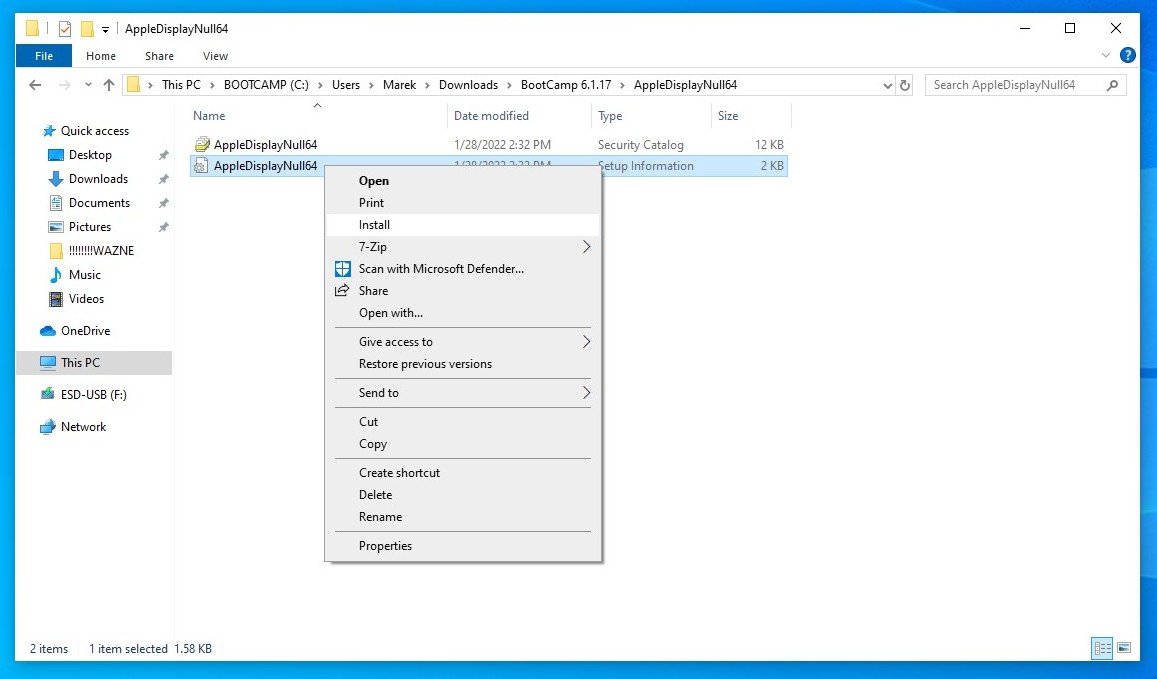
Step 37Enter AppleDisplayNull64 subfolder and right click on AppleDisplayNull64.inf file, then choose Install to install the driver.
|
|
|
|
|
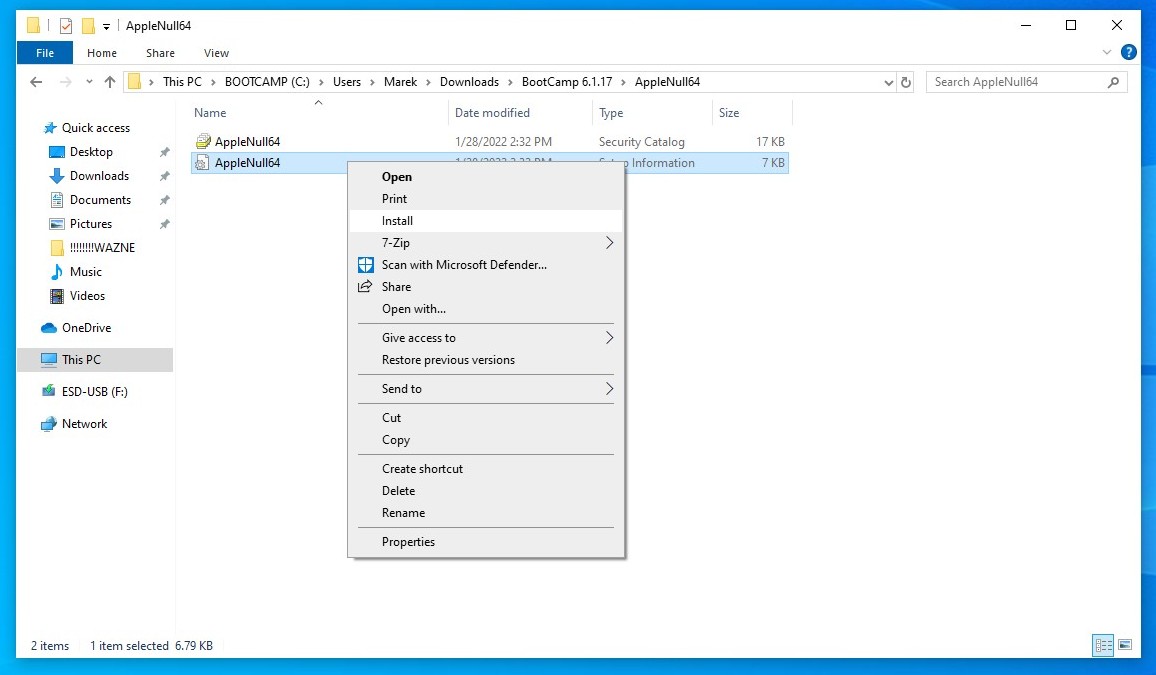
Step 38Go back to BootCamp 6.1.17 folder. Enter AppleNull64 subfolder and right click on AppleNull64.inf file, then choose Install to install the driver.
|
|
|
|
|
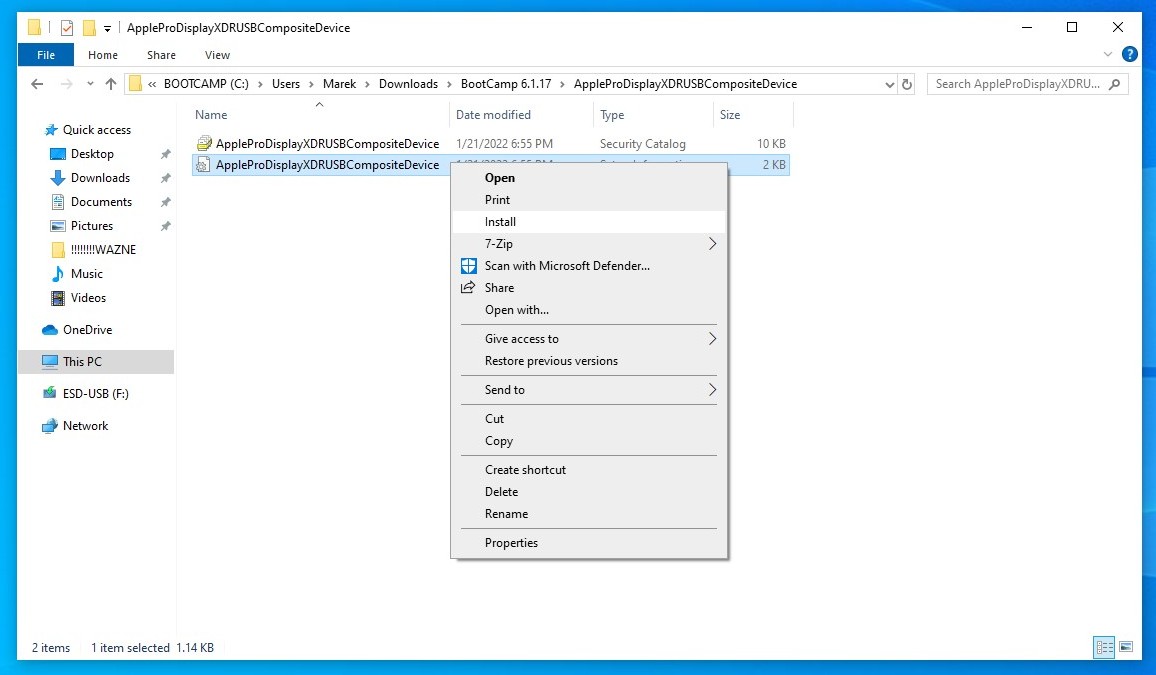
Step 39Again go back to BootCamp 6.1.17 folder. Enter AppleProDisplayXDRUSBCompositeDevice subfolder and right click on AppleProDisplayXDRUSBCompositeDevice.inf file, then choose Install to install the driver.
|
|
|
|
|
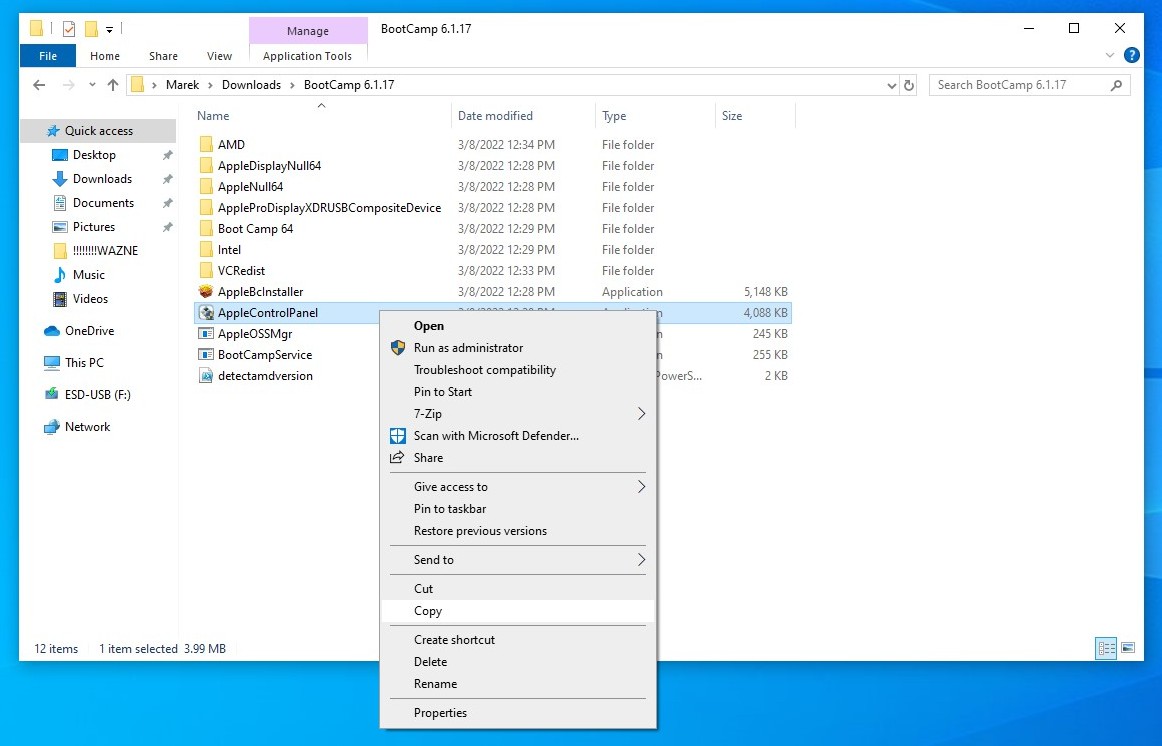
Step 40One again go back to BootCamp 6.1.17 folder. Select AppleControlPanel.exe file and choose Copy option from context menu to copy it into clipboard.
|
|
|
|
|
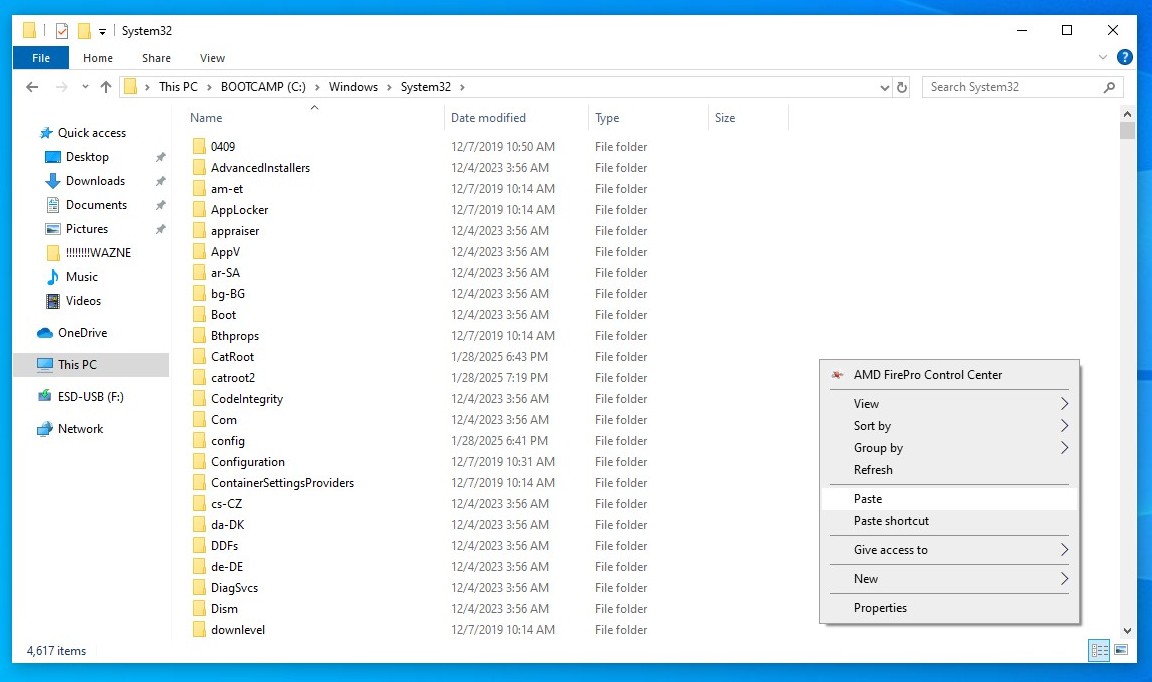
Step 41Head over to C:\Windows\System32 and paste the file by right clicking somewhere on white space and choosing Paste option from context menu.
|
|
|
|
|
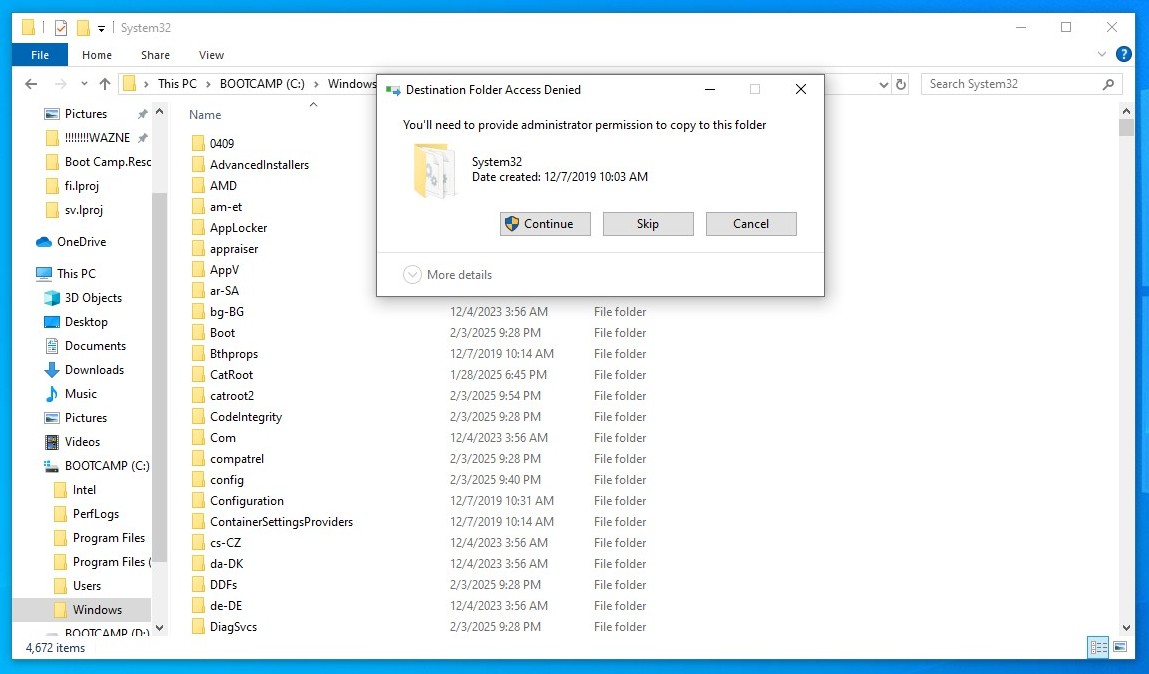
Step 42Confirm file replacement by clicking "Replace the file in the destination" option.
|
|
|
|
|
Step 43Confirm file replacement by clicking "Replace the file in the destination" option.
|
|
|
|
|
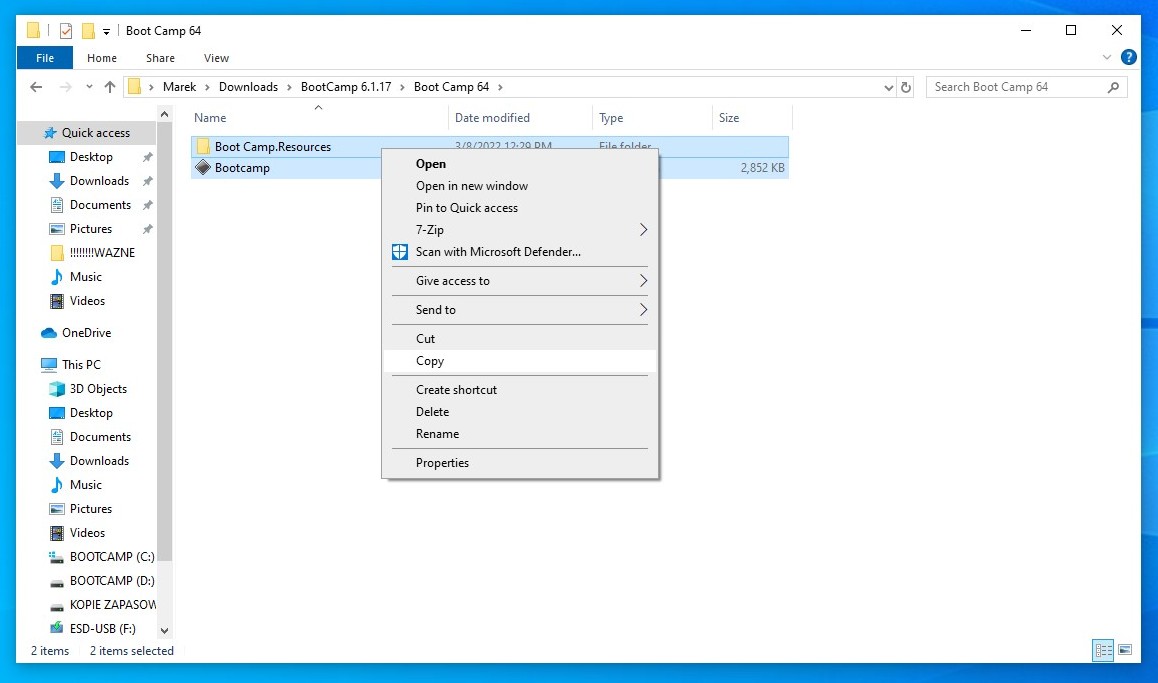
Step 44Again go back to BootCamp 6.1.17 folder and enter Boot Camp 64 subfolder. Select both Boot Camp.Resources folder and Bootcamp.exe file, then right click on them and choose Copy option to copy them into clipboard.
|
|
|
|
|
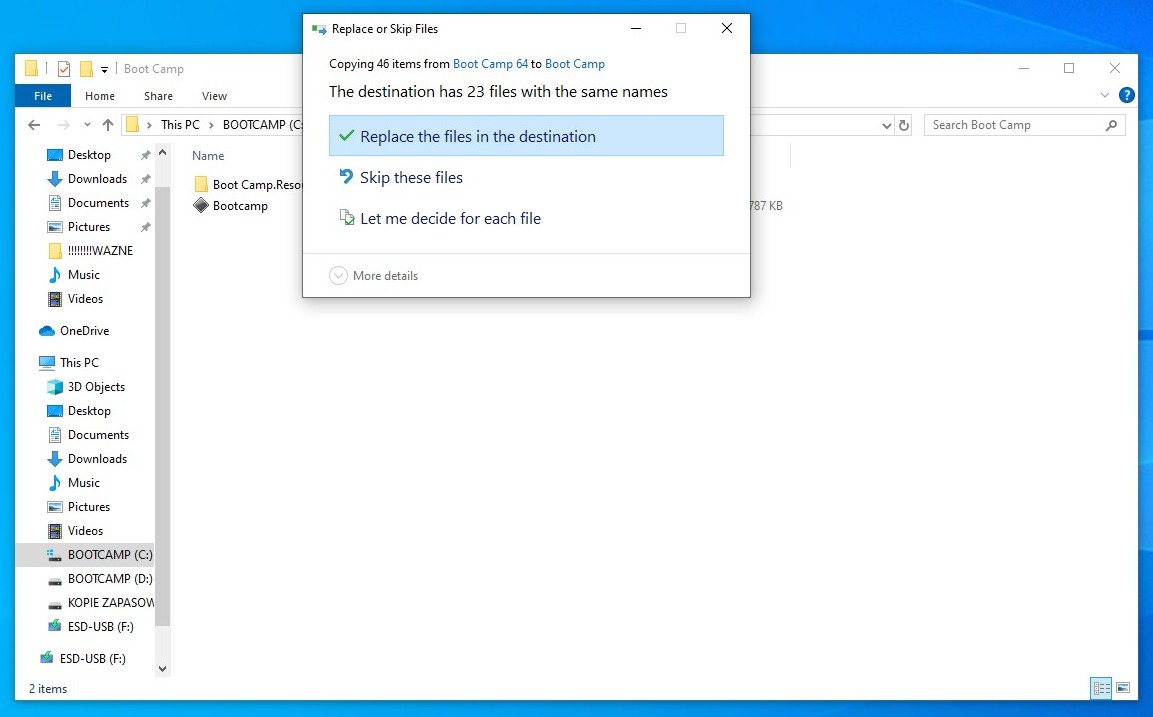
Step 45Head over to C:\Program Files\Apple BootCamp and paste them by right clicking somewhere on white space and choosing Paste from context menu.
Confirm file replacement by clicking "Replace the files in the destination" option.
|
|
|
|
|
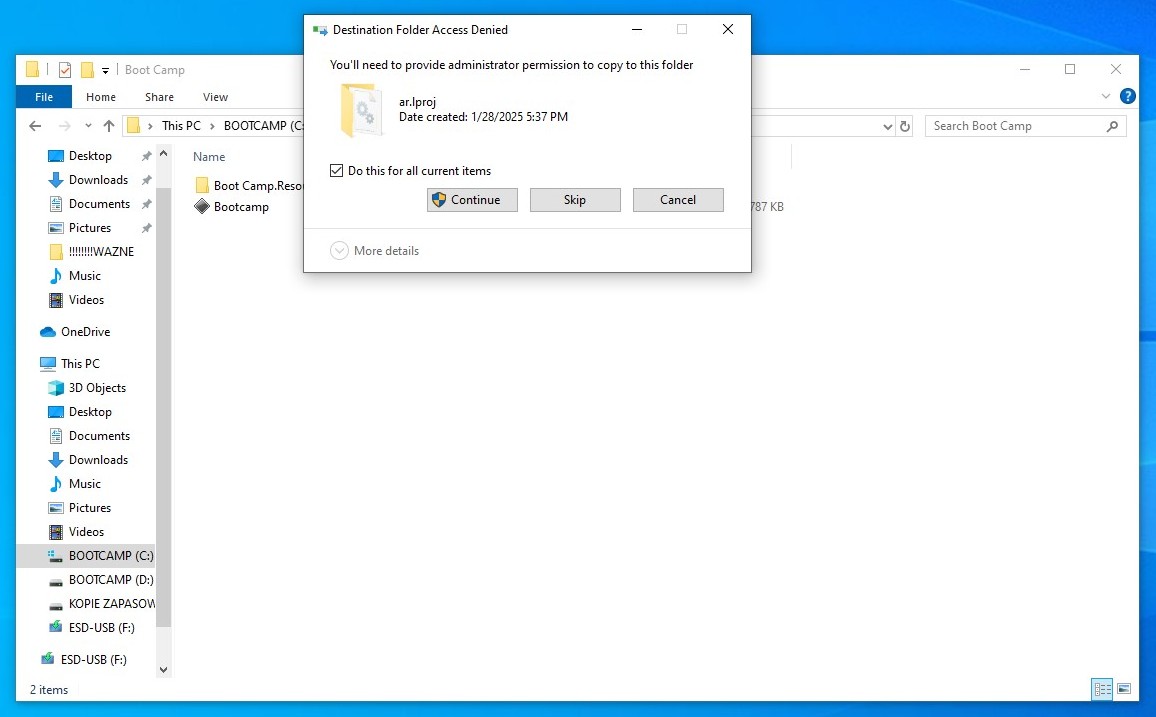
Step 46Select the checkbox next to "Do this for all current items" and click Continue button to finish the replacement.
|
|
|
|
|
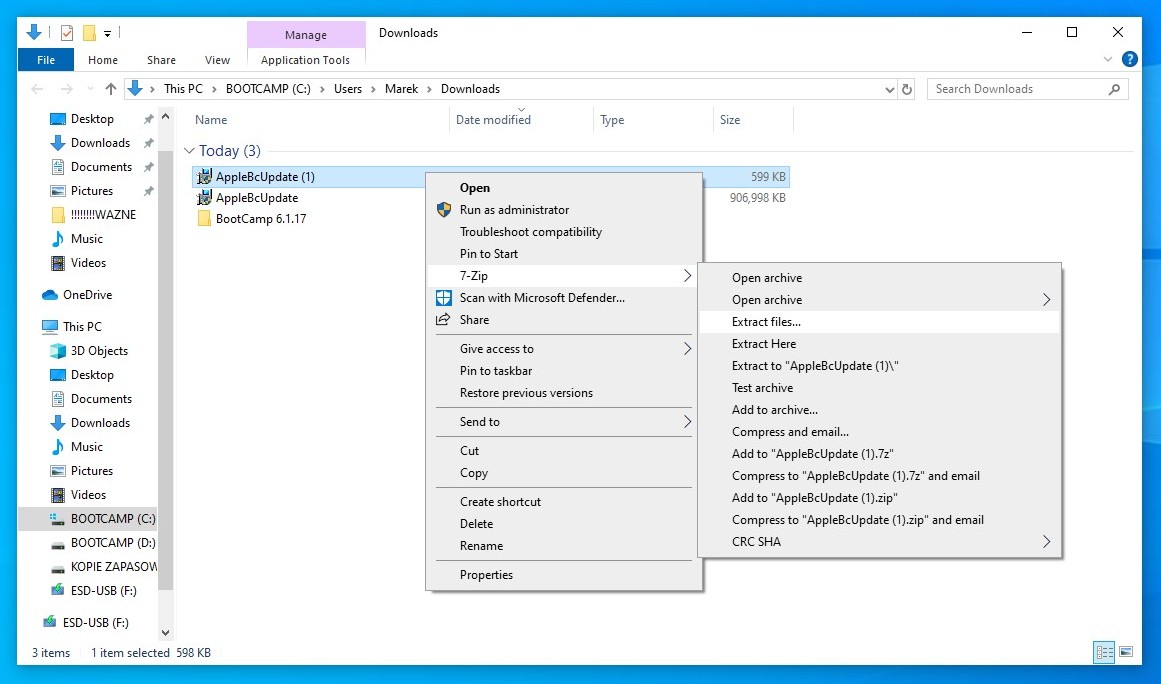
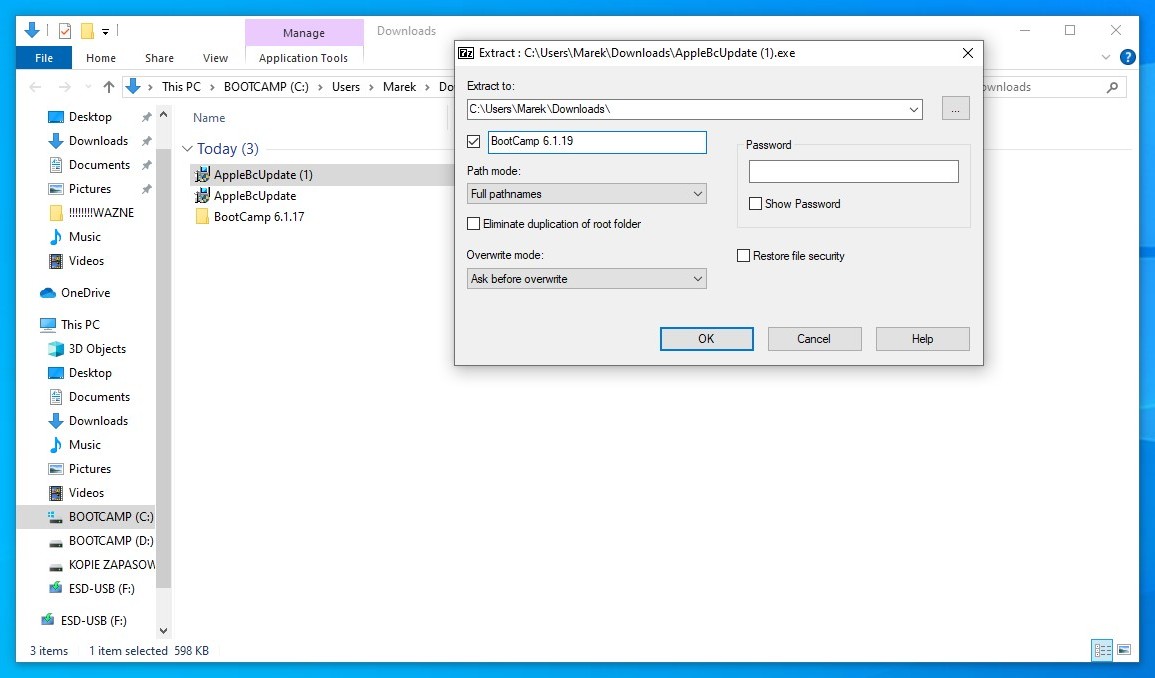
Step 47Download Apple BootCamp version 6.1.19 from here. This will add Magic Trackpad drivers with Precision Touchpad support. You will get vastly better trackpad experience on Windows, including macOS-like smooth scrolling and gestures.
Go to your Downloads folder and right click on AppleBcUpdate.exe file. Select 7-Zip, then Extract files... from the context menu.
|
|
|
|
|
Step 48Rename the default name to BootCamp 6.1.19 in the second text field and click OK button. |
|
|
|
|
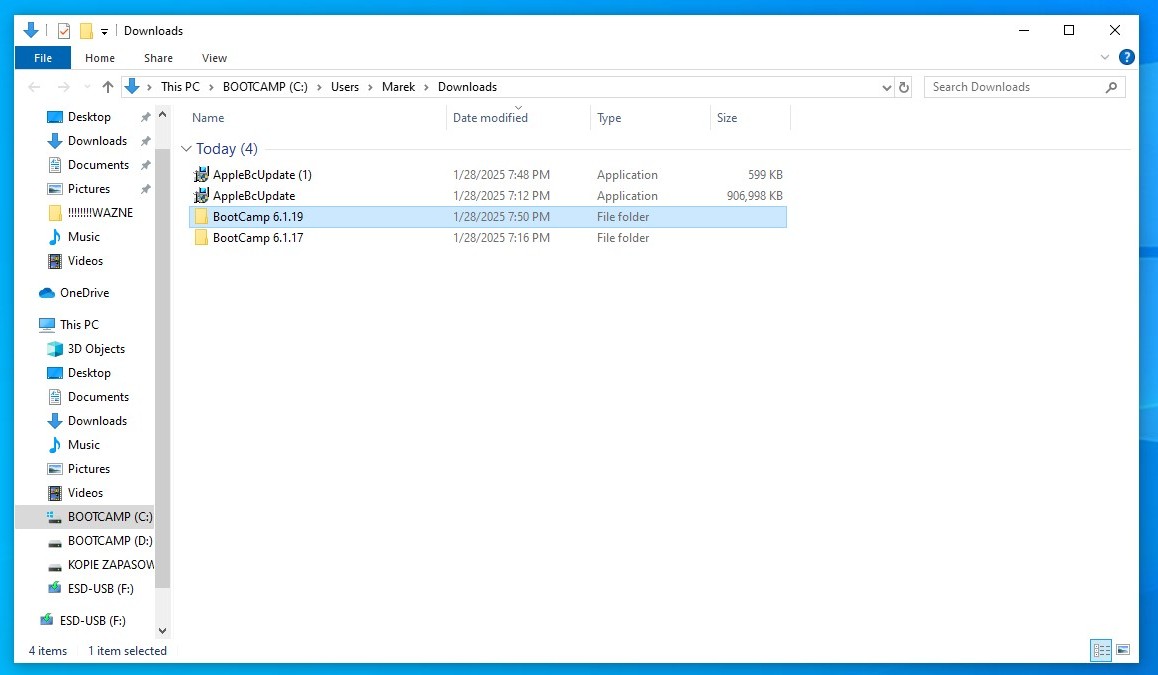
Step 49You should have BootCamp 6.1.19 folder ready. |
|
|
|
|
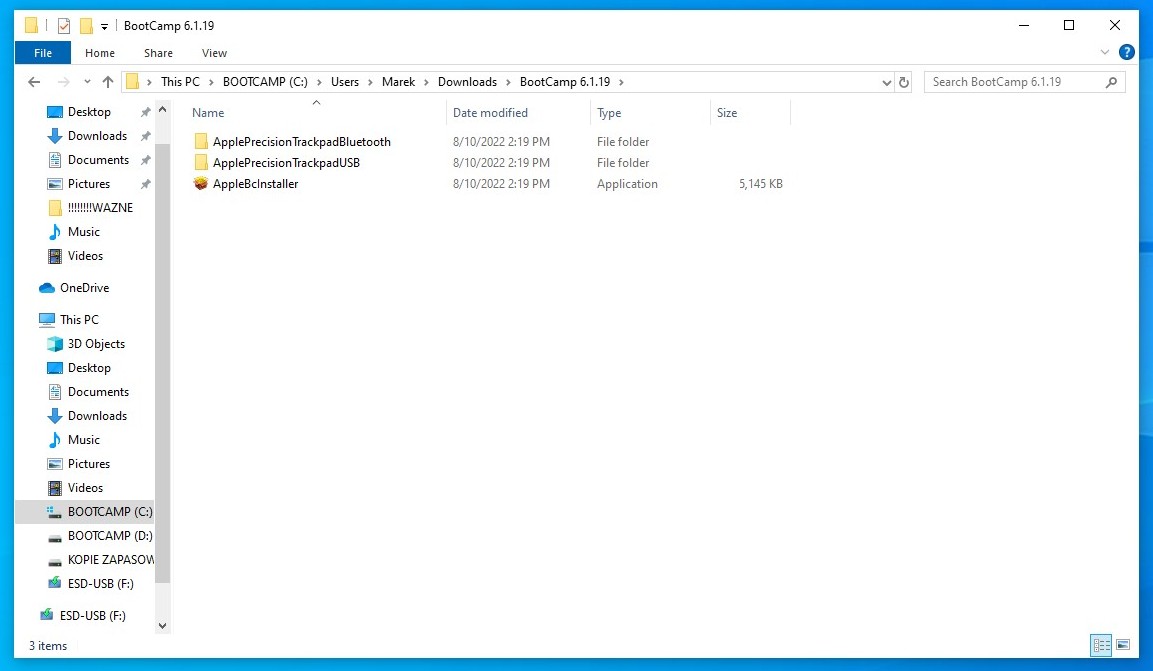
Step 50Inside this folder you will find some subfolders and files. We will only need subfolders this time. |
|
|
|
|
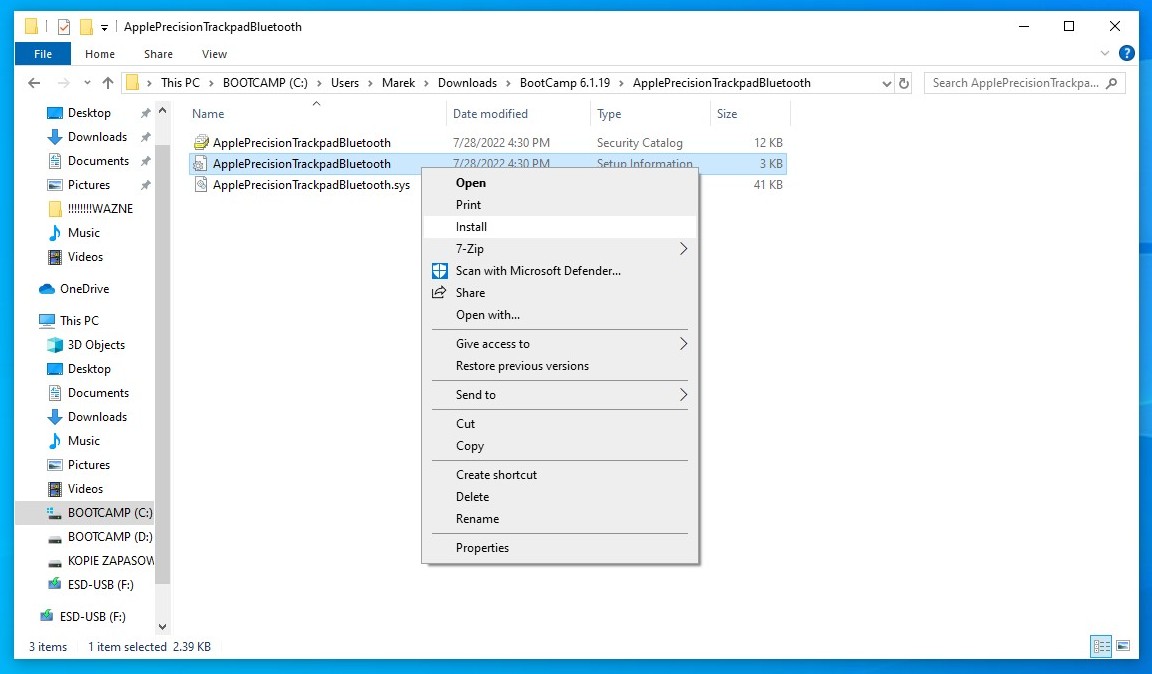
Step 51Enter ApplePrecisionTrackpadBluetooth subfolder and right click on ApplePrecisionTrackpadBluetooth.inf file, then choose Install to install the driver. |
|
|
|
|
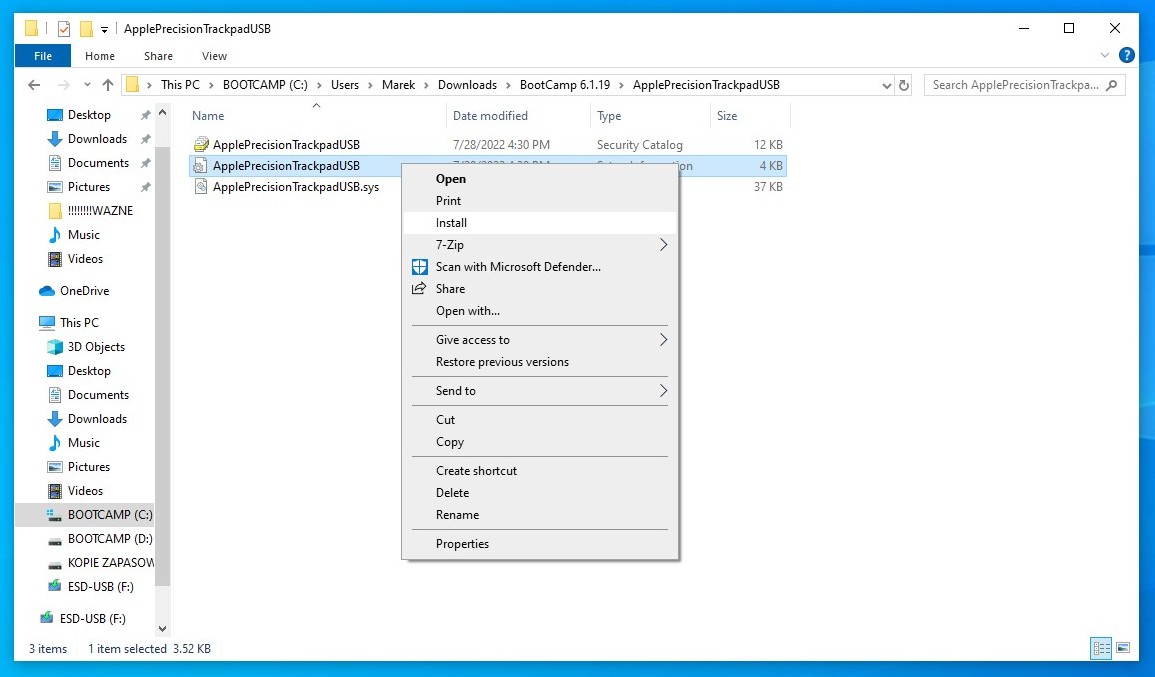
Step 52Go back to BootCamp 6.1.19 folder. Now enter ApplePrecisionTrackpadUSB subfolder and right click on ApplePrecisionTrackpadUSB.inf file, then choose Install to install the driver. |
|
|
|
|
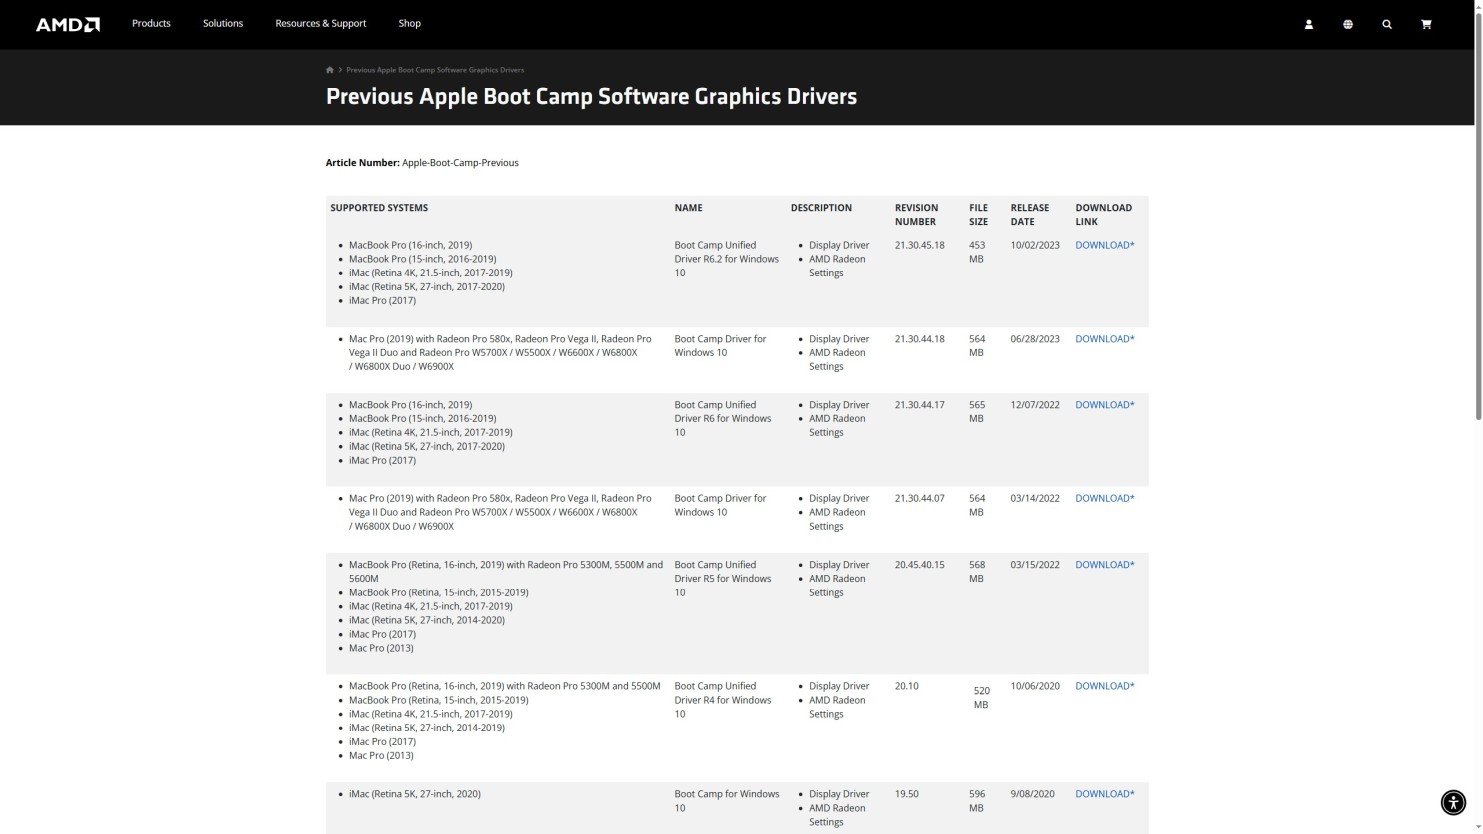
Step 53Now we need to update AMD drivers for the integrated AMD FirePro D300/D500/D700 graphics cards. All cards use the same driver version.
Open a following website in any web browser: https://www.amd.com/en/resources/support-articles/release-notes/Apple-Boot-Camp-Previous.html
Look for a line with Mac Pro (2013) and click DOWNLOAD* link to download it. |
|
|
|
|
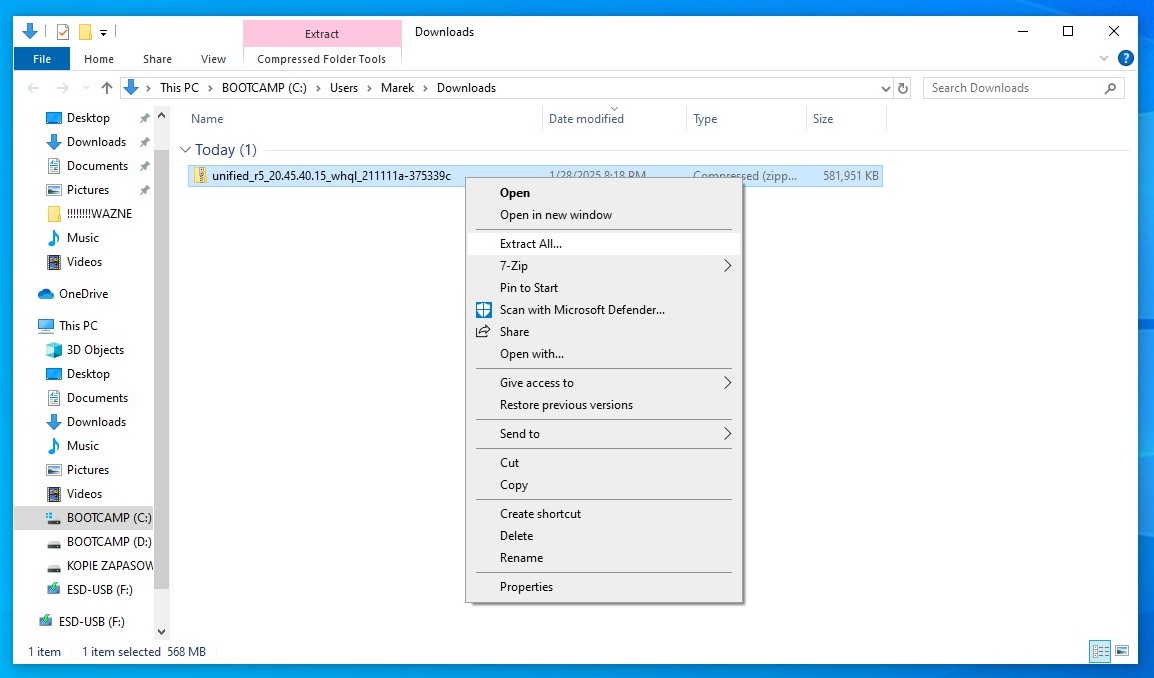
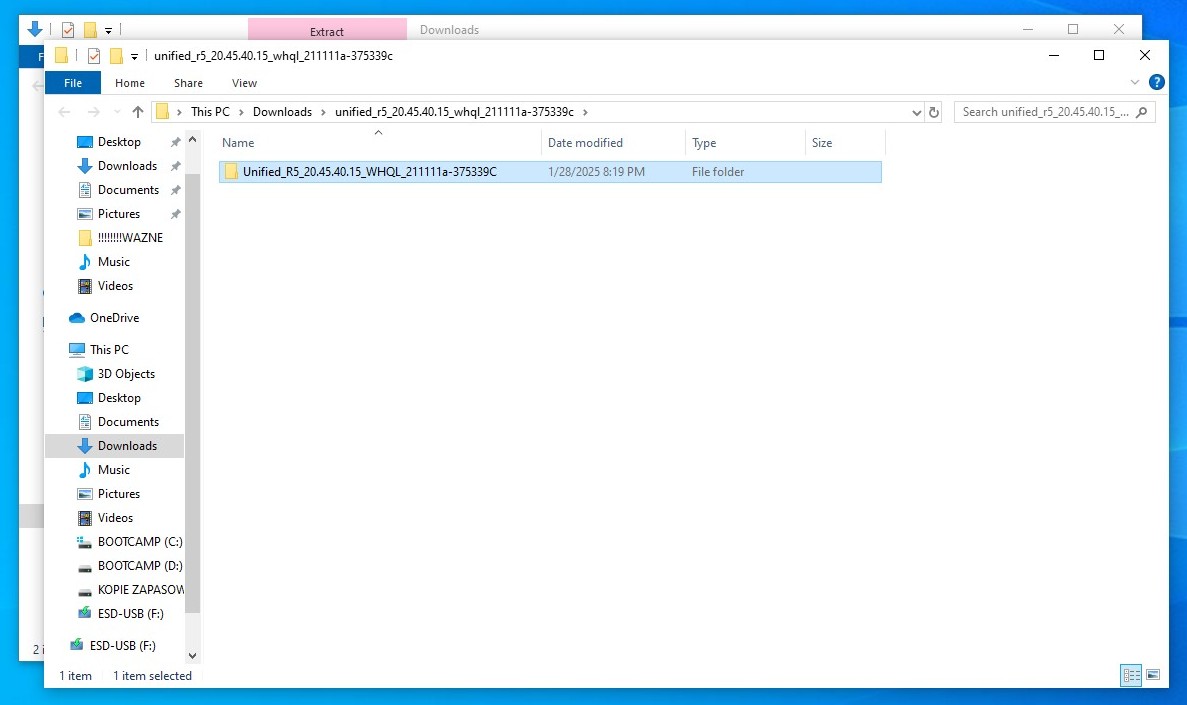
Step 54In your downloads folder you will find unified_r5_20.45.40.15_whql_211111a-375339c.zip file. Right click on it and choose Extract All... option to extract files.
|
|
|
|
|
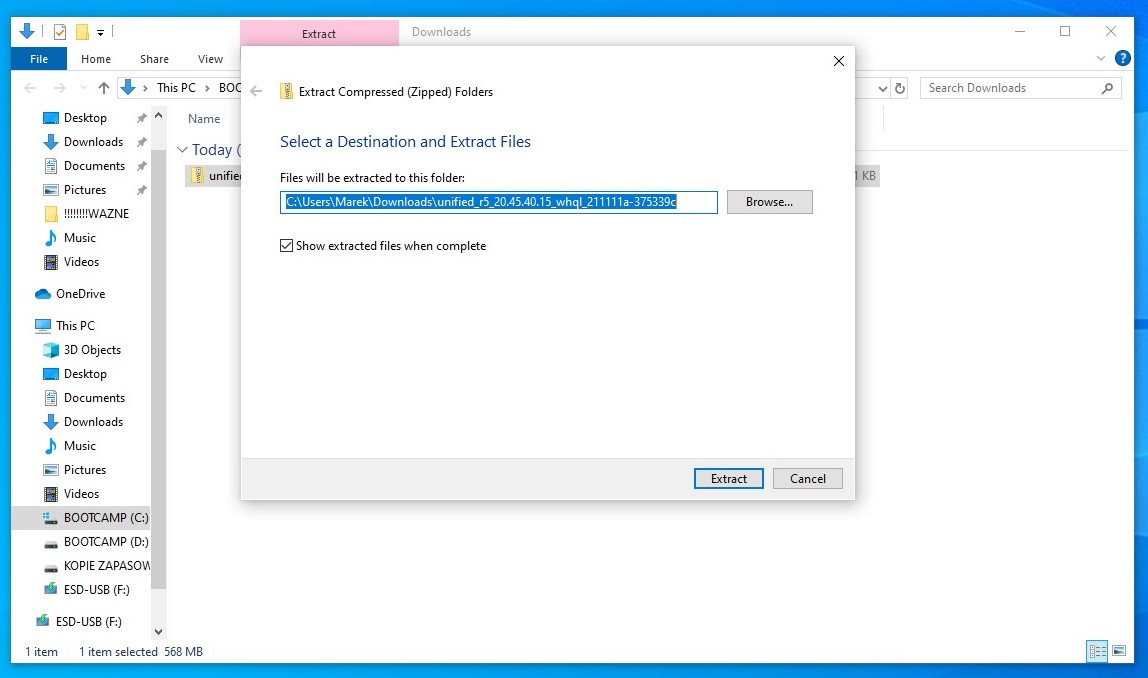
Step 55Leave the default path as is and check the checkbox next to "Show extracted files when complete" and click Extract button. |
|
|
|
|
Step 56File will be extracted into Unified_R5_20.45.40.15_WHQL_211111a-375339C folder. However due to some error inside the installer the driver can't be installed in a normal way.
|
|
|
|
|
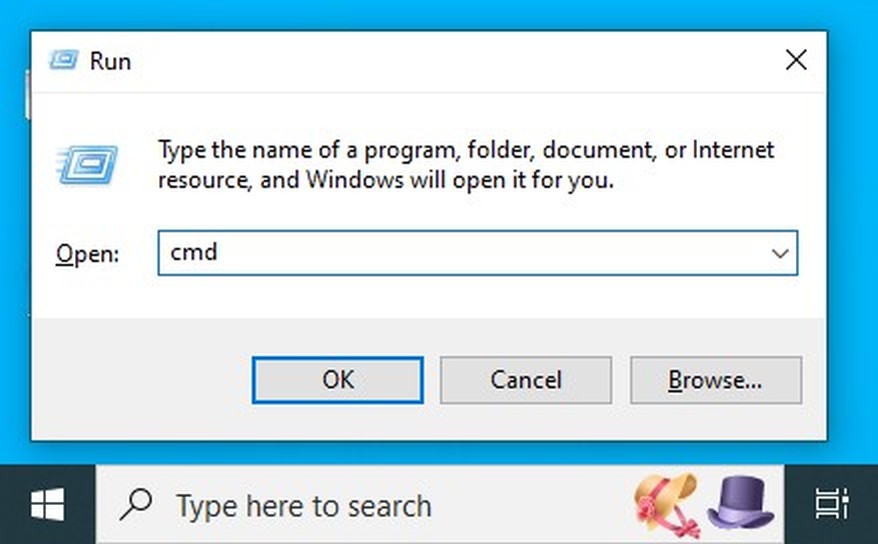
Step 57Press Option+R keys (or Windows key + R keys) to launch run. Type cmd in the text field and press OK button to launch command prompt.
|
|
|
|
|
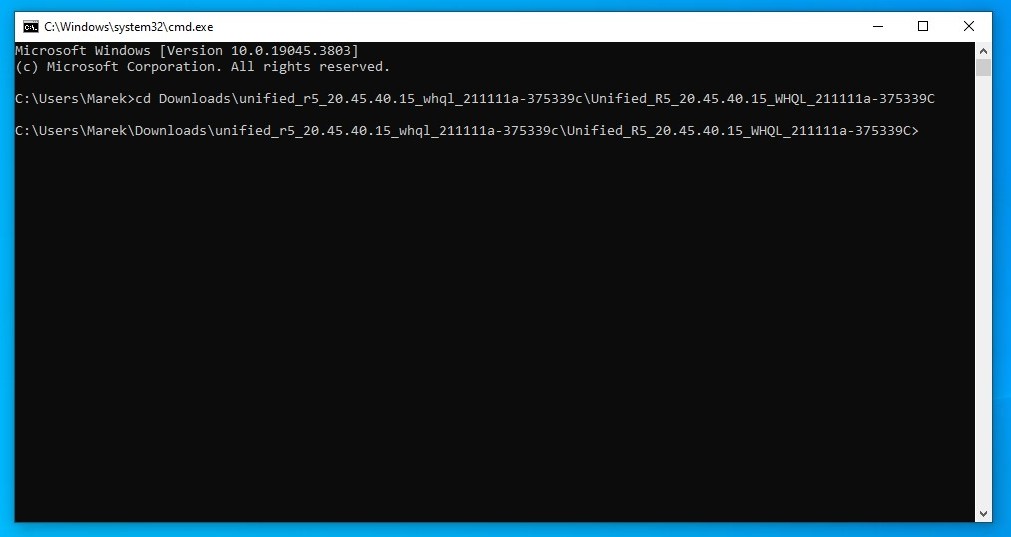
Step 58Now type cd Downloads\unified_r5_20.45.40.15_whql_211111a-375339c.zip\Unified_R5_20.45.40.15_WHQL_211111a-375339C to enter the folder (all in one line). You can press TAB after each slash and it will be filled automatically.
|
|
|
|
|
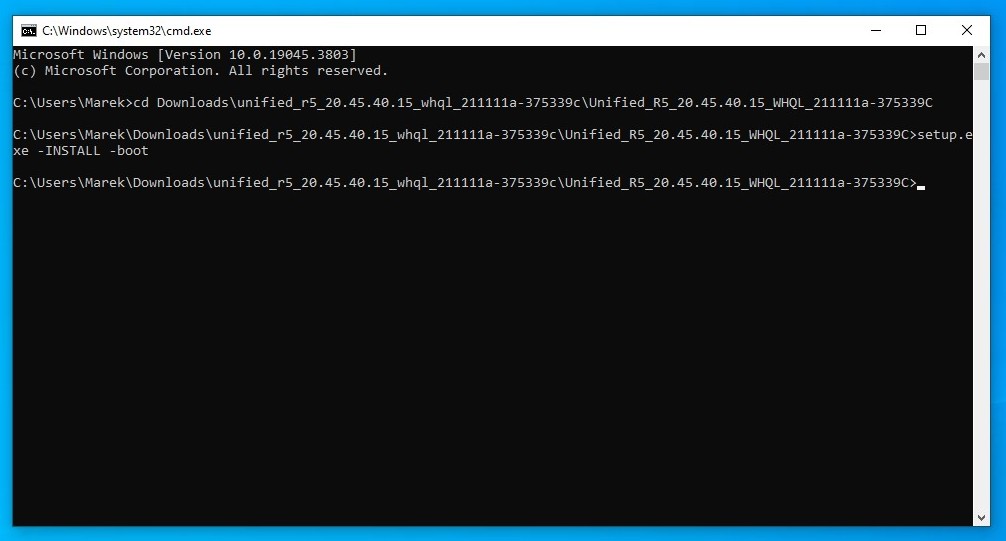
Step 59Type: setup.exe -INSTALL -boot
and press ENTER.
The driver will be installed in the background. There would be no progress visible. It will take around 5 minutes to complete. Then the system will be automatically restarted. Just wait patiently.
|
|
|
|
|
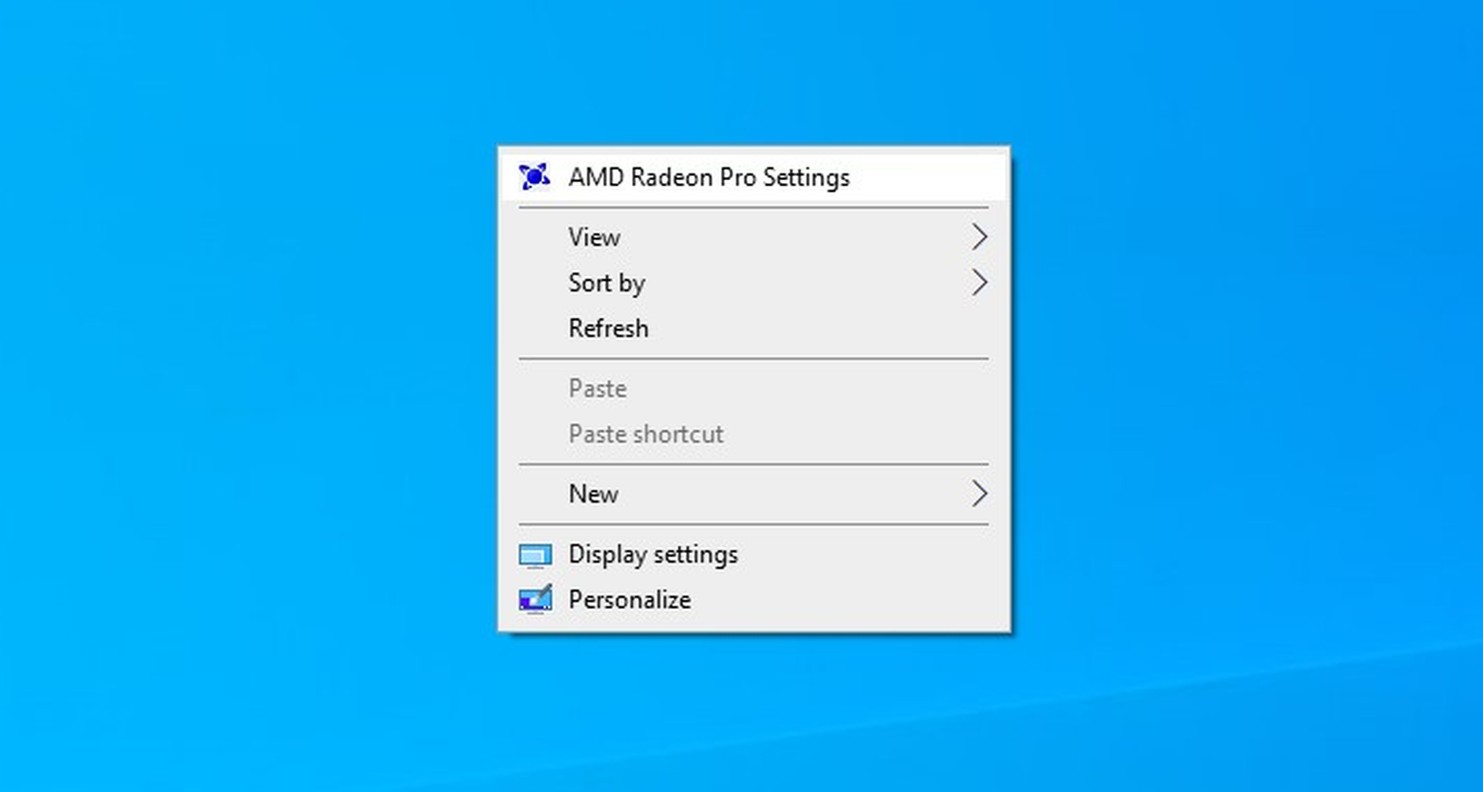
Step 60Post computer restart you can test if the new display driver is working properly. To do so right click on the desktop and choose AMD Radeon Pro Settings. |
|
|
|
|
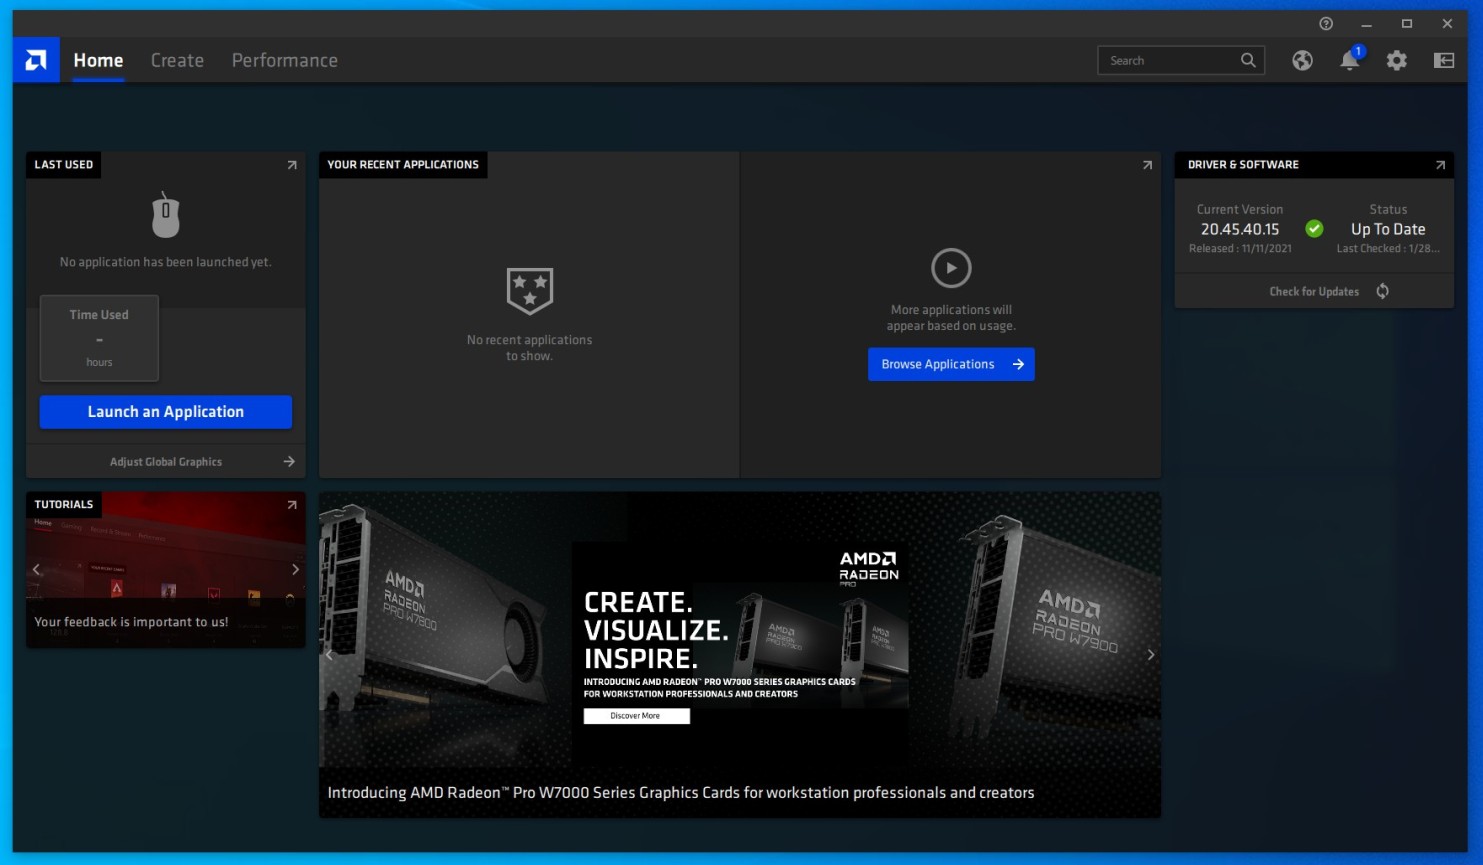
Step 61If you see a screen like the one pictured, it means it's working perfectly. You don't need to change anything here unless needed. |
|
|
|
|
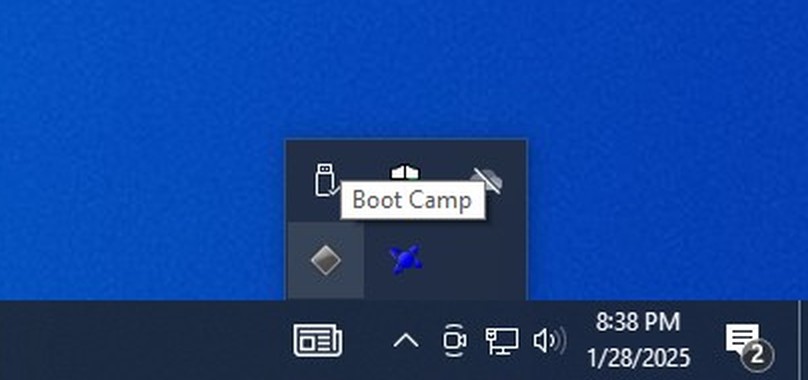
Step 62Now we can test if the Boot Camp application itself it working properly.
Apple BootCamp is located in system tray. You need to right click gray triangle icon in your tray (sometimes you need to click an arrow to reveal all tray icons). |
|
|
|
|
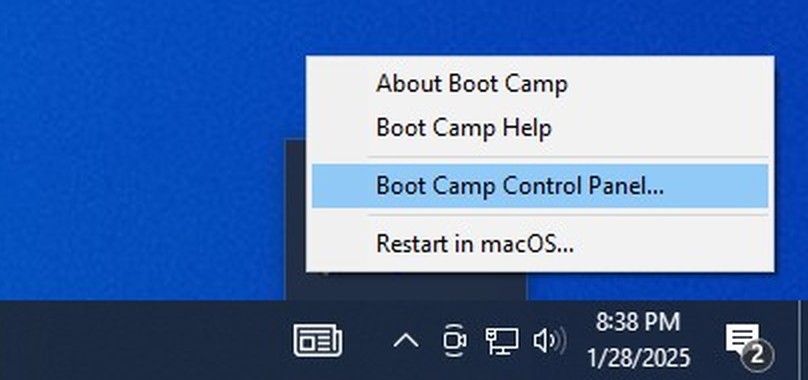
Step 63Now select Boot Camp Control Panel... option from the context menu. |
|
|
|
|
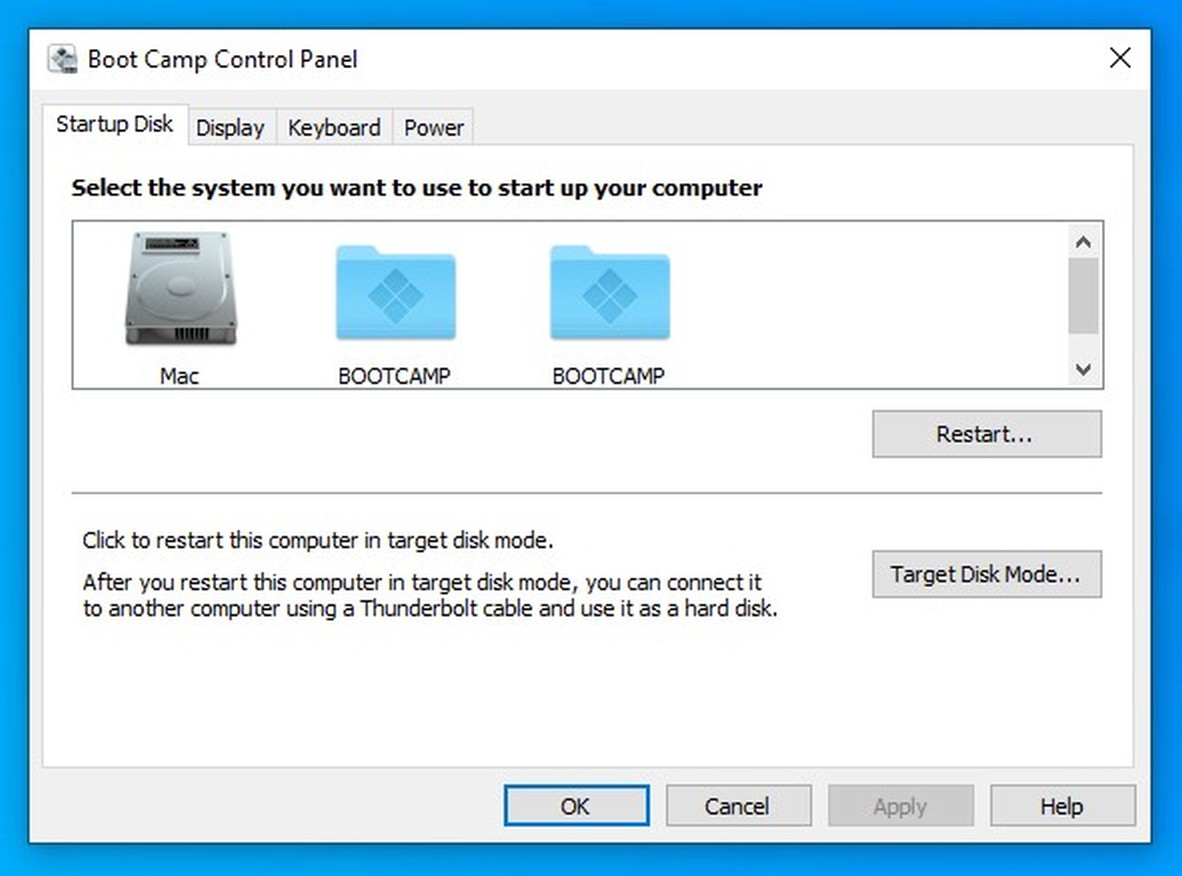
Step 64Here you can select the default drive to boot the computer from. It could be either any macOS partition or Windows partition. |
|
|
|
|
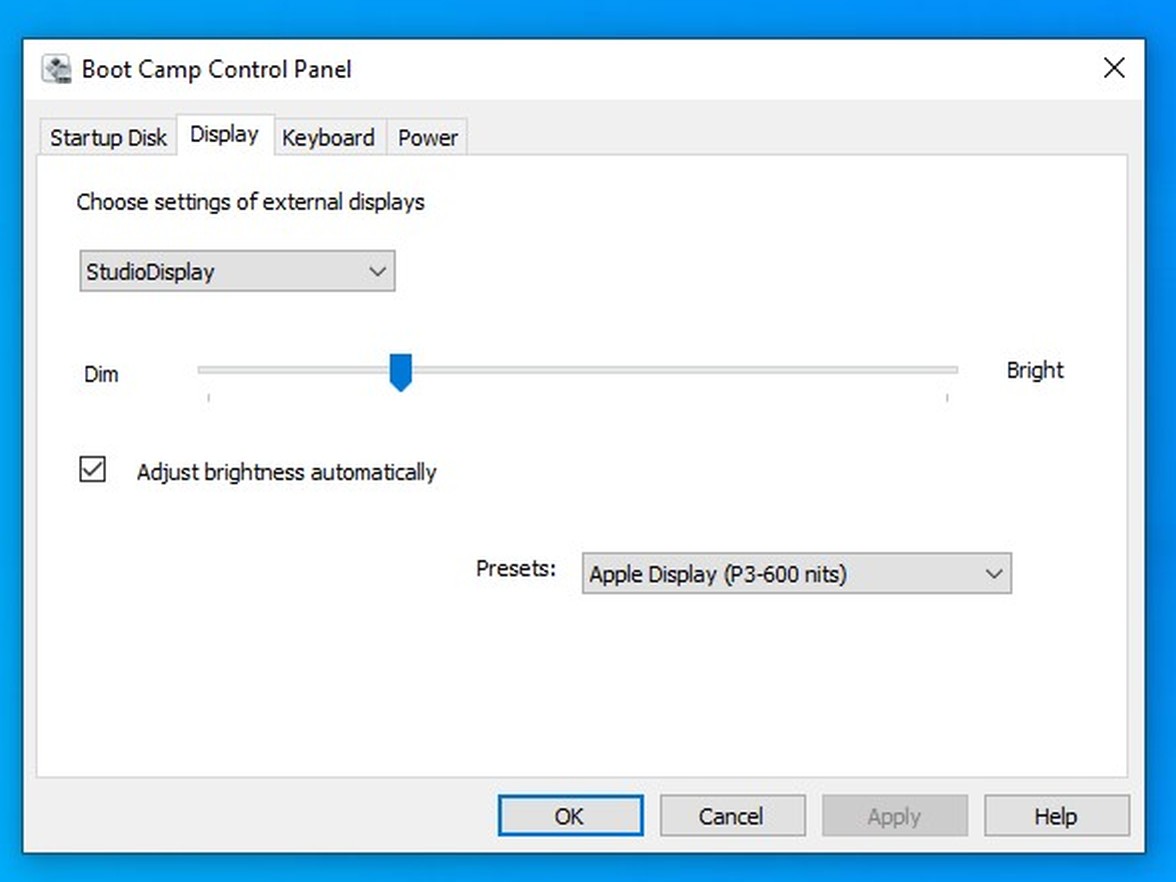
Step 65If you have Apple Studio Display or Apple Pro Display XDR you should now see dimming slider and automatic brightness checkbox. Also there are presets to choose from.
Please note brightness control only works on default Apple Display (P3-600 nits) preset.
That's it. Enjoy! |

